This tutorial will teach you how to add Spring Security to your project and enable in-memory basic authentication. You will learn how to configure two different users with different Roles and Privileges. Both users’ roles and privileges will be stored in the memory of your Spring Boot application.
If you use Spring Framework and OAuth, you might also be interested in learning how to implement the Role-Based access control with the new Spring Authorization Server.
Create a New Spring Boot Project
I hope you already know how to create a new Spring Boot project and make it a RESTful Web service, but just in case you do not have one, here is a quick tutorial that shows how to build a very simple Web Service project with Spring Boot( Includes video tutorial ).
Add Spring Security
Once your new Spring Boot project is created, open the pom.xml file and ensure that you have the following two dependencies added.
<dependency>
 <groupId>org.springframework.boot</groupId>
 <artifactId>spring-boot-starter-security</artifactId>
</dependency>
<dependency>
 <groupId>org.springframework.boot</groupId>
 <artifactId>spring-boot-starter-web</artifactId>
</dependency>
The first dependency on the list is spring-boot-starter-security, which will add Spring Security to your Spring Boot project. After you add this dependency to your project, all web service endpoints you create will require user authentication.
If you attempt to access one of your RESTful Web Service endpoints via a browser window, you will be prompted to provide a username and password.
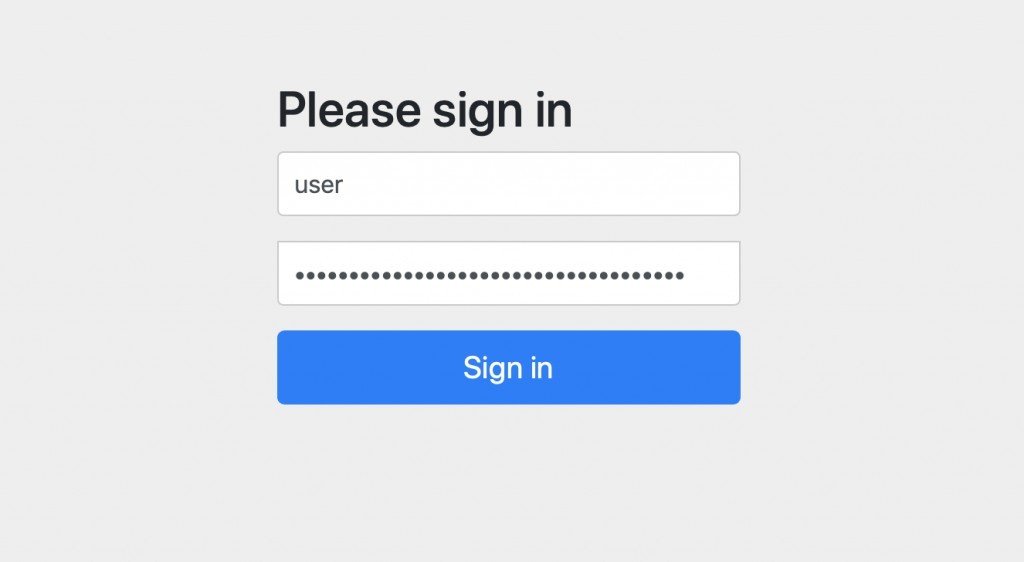
Use “user” as a user name and to find a password, look into your project’s console. You should see something like this in the console output.
Using generated security password: 3f45799a-9ad7-41f5-84ba-8d53b2d1fe19
The password, in your case, will, of course, be different.
Configure In-Memory Users with Roles
We now need to create a couple of users that will be stored in memory, and their custom username and password can be used to authenticate with our web service endpoint. Each user we are going to create will have its own ROLE. One user will have the role of a regular user, and the other user will have the role of a manager.
Create a new class and:
- Annotate it with @Configuration annotation and,
- Add code to create two users with different roles.
package com.appsdeveloperblog.tutorials.inmemoryauth.security;

import org.springframework.context.annotation.Bean;
import org.springframework.context.annotation.Configuration;
import org.springframework.security.config.annotation.web.configuration.WebSecurityConfigurerAdapter;
import org.springframework.security.core.userdetails.User;
import org.springframework.security.core.userdetails.UserDetails;
import org.springframework.security.core.userdetails.UserDetailsService;
import org.springframework.security.crypto.factory.PasswordEncoderFactories;
import org.springframework.security.provisioning.InMemoryUserDetailsManager;

@Configuration
public class SecurityConfig {

    @Bean
    public UserDetailsService userDetailsService() {

        //User Role
        UserDetails theUser = User.withUsername("sergey")
                        .passwordEncoder(PasswordEncoderFactories.createDelegatingPasswordEncoder()::encode)
                        .password("12345678").roles("USER").build();

        //Manager Role
        UserDetails theManager = User.withUsername("john")
                .passwordEncoder(PasswordEncoderFactories.createDelegatingPasswordEncoder()::encode)
                .password("87654321").roles("MANAGER").build();


        InMemoryUserDetailsManager userDetailsManager = new InMemoryUserDetailsManager();

        userDetailsManager.createUser(theUser);
        userDetailsManager.createUser(theManager);

        return userDetailsManager;

    }

}
The code example above will create two users with different roles, and you should be able to use any of these users to authenticate when Spring Security prompts you to provide a username and password.
The InMemoryUserDetailsManager class in Spring Security is used to provide an implementation of UserDetailsService that stores user information in memory. It allows you to define a set of users, their passwords, and authorities (roles) directly in your code, which can be useful for testing and prototyping purposes.
When you create an instance of InMemoryUserDetailsManager, you can use its createUser method to create new users and specify their password and authorities.
Alternative approach
You can also use an alternative approach to create users with their roles.
Please note that in the following approach, each password has a prefix of {xxxx} which specifies what password encoder should be used to encode the provided password. Below are different values you can use as a password prefix.
- Use {bcrypt} for BCryptPasswordEncoder,
- Use {noop} for NoOpPasswordEncoder,
- Use {pbkdf2} for Pbkdf2PasswordEncoder,
- Use {scrypt} for SCryptPasswordEncoder,
- Use {sha256} for StandardPasswordEncoder.
package com.appsdeveloperblog.tutorials.inmemoryauth.security;

import org.springframework.context.annotation.Configuration;
import org.springframework.security.config.annotation.authentication.builders.AuthenticationManagerBuilder;
import org.springframework.security.config.annotation.web.configuration.WebSecurityConfigurerAdapter;

@Configuration
public class SecurityConfig{

    @Bean
    public InMemoryUserDetailsManager configure(HttpSecurity http) throws Exception {
        UserDetails user = User.withDefaultPasswordEncoder()
                .username("sergey")
                .password("{noop}12345678")
                .roles("USER")
                .build();

        UserDetails user2 = User.withDefaultPasswordEncoder()
                .username("John")
                .password("{noop}87654321")
                .roles("MANAGER")
                .build();

        return new InMemoryUserDetailsManager(user, user2);
    }

}
Configure In-Memory Users with Authorities
A user with a Role can have multiple Authorities. We also sometimes refer to Authorities as Privileges. For example, a user with the role SUPER_MANAGER might have authorities like DELETE_USER_AUTHORITY, UPDATE_USER_AUTHORITY while a user with a role with MANAGER might not have the privilege to delete users and only have an UPDATE_USER_AUTHORITY. Using Authorities, you can define users with more granular access control and restrict web service endpoints and HTTP requests to users with specific authorities rather than roles.
In the below code example, any user with a DELETE_USER_AUTHORITY will be able to communicate with /managers/status/check web service endpoints.
    @Bean
    public SecurityFilterChain configure(HttpSecurity http) throws Exception {
        http
                .csrf((csrf) -> csrf.disable())
                .authorizeHttpRequests((authz) -> authz
                .requestMatchers("/managers/status/check").hasAnyAuthority("DELETE_USER_AUTHORITY")
                .requestMatchers("/users/status/check").hasRole("USER")
                .anyRequest().authenticated())
                .httpBasic((httpBasic) -> {
                    // customize httpBasic here
                })
                .sessionManagement((session) -> session
                .sessionCreationPolicy(SessionCreationPolicy.STATELESS));

        return http.build();
    }
Where:
http.csrf((csrf) -> csrf.disable()): This line disables CSRF (Cross-Site Request Forgery) protection. CSRF is an attack that tricks the victim into submitting a malicious request. In many cases, it’s important to have CSRF protection enabled, but there might be reasons why you’d want to disable it, such as if your service is stateless or if you’re managing CSRF in some other way..authorizeHttpRequests((authz) -> authz .requestMatchers("/managers/status/check").hasAnyAuthority("DELETE_USER_AUTHORITY") .requestMatchers("/users/status/check").hasRole("USER") .anyRequest().authenticated()): This part is setting up authorization rules. It’s saying that any HTTP request that matches the pattern “/managers/status/check” should be accessible only to users with the authority “DELETE_USER_AUTHORITY”, and any request that matches “/users/status/check” should be accessible only to users with the role “USER”. Any other request should be accessible only to authenticated users, i.e., users who have logged in..httpBasic((httpBasic) -> { // customize httpBasic here }): This enables HTTP Basic Authentication, a simple authentication scheme built into the HTTP protocol. The enclosed block can be used to customize the httpBasic authentication process..sessionManagement((session) -> session .sessionCreationPolicy(SessionCreationPolicy.STATELESS)): This line defines the session management policy to be stateless. In a stateless policy, no session data is stored on the server side between requests. This is common in REST APIs and can help to make your application more scalable.return http.build();: Finally, after all these configurations,http.build()is called to build theSecurityFilterChainwith the configured settings, which is then returned by the method.
Define Web Service Endpoints
Let’s now create a couple of Web Service endpoints and learn how to restrict access to them to a specific Role and an Authority. You might also use method-level security annotations to secure Rest Controller endpoints.
In the following code example, we will create a new Rest Controller class with two endpoints:
- /users/status/check
- /managers/status/check
package com.appsdeveloperblog.tutorials.inmemoryauth.controllers;

import org.springframework.web.bind.annotation.GetMapping;
import org.springframework.web.bind.annotation.RestController;

@RestController
public class UsersController {

    @GetMapping("/users/status/check")
    public String usersStatusCheck() {
        return "Authorized user";
    }

    @GetMapping("/managers/status/check")
    public String managersStatusCheck() {
        return "Authorized manager";
    }

}
Access Control for a User with a hasRole or AnyRole
Let’s now configure HttpSecurity, so that web service endpoint /users/status/check is available only to users with a role USER and web service endpoint /managers/status/check is available only to users with a role MANAGER.
Add the following function to the SecureConfig class.
    @Bean
    public SecurityFilterChain configure(HttpSecurity http) throws Exception {
        http
                .csrf((csrf) -> csrf.disable())
                .authorizeHttpRequests((authz) -> authz
                .requestMatchers("/managers/status/check").hasRole("MANAGER")
                .requestMatchers("/users/status/check").hasRole("USER")
                .anyRequest().authenticated())
                .httpBasic((httpBasic) -> {
                    // customize httpBasic here
                })
                .sessionManagement((session) -> session
                .sessionCreationPolicy(SessionCreationPolicy.STATELESS));

        return http.build();
    }
If the web service endpoint needs to be accessible by a user with multiple roles, then you can use hasAnyRole instead of hasRole. Like so:
.antMatchers("/users/status/check").hasAnyRole("USER", "MANAGER")
Here is a complete SecureConfig class.
package com.appsdeveloperblog.tutorials.inmemoryauth.security;

import org.springframework.context.annotation.Configuration;
import org.springframework.security.config.annotation.authentication.builders.AuthenticationManagerBuilder;
import org.springframework.security.config.annotation.web.builders.HttpSecurity;
import org.springframework.security.config.annotation.web.configuration.WebSecurityConfigurerAdapter;
import org.springframework.security.config.http.SessionCreationPolicy;

@Configuration
public class SecurityConfig{

    @Bean
    public SecurityFilterChain configure(HttpSecurity http) throws Exception {
        http
                .csrf((csrf) -> csrf.disable())
                .authorizeHttpRequests((authz) -> authz
                .requestMatchers("/managers/status/check").hasRole("MANAGER")
                .requestMatchers("/users/status/check").hasRole("USER")
                .anyRequest().authenticated())
                .httpBasic((httpBasic) -> {
                    // customize httpBasic here
                })
                .sessionManagement((session) -> session
                .sessionCreationPolicy(SessionCreationPolicy.STATELESS));

        return http.build();
    }


    @Bean
    public InMemoryUserDetailsManager configure(HttpSecurity http) throws Exception {
        UserDetails user = User.withDefaultPasswordEncoder()
                .username("sergey")
                .password("{noop}12345678")
                .roles("USER")
                .build();

        UserDetails user2 = User.withDefaultPasswordEncoder()
                .username("John")
                .password("{noop}87654321")
                .roles("MANAGER")
                .build();

        return new InMemoryUserDetailsManager(user, user2);
    }
}
If you run your application now and send HTTP GET request to /managers/status/check, the only user credentials that will allow access, will be for a user with the role MANAGER.
Access Control for a User with an Authority or AnyAuthority
In the example below, we will allow any user with DELETE_USER_AUTHORITY to be able to perform an HTTP DELETE operation on a web service endpoint /users/**.
    @Bean
    public SecurityFilterChain configure(HttpSecurity http) throws Exception {
        http
                .csrf((csrf) -> csrf.disable())
                .authorizeHttpRequests((authz) -> authz
                .requestMatchers(HttpMethod.DELETE, "/users/**").hasAuthority("DELETE_USER_AUTHORITY")
                .anyRequest().authenticated())
                .httpBasic((httpBasic) -> {
                    // customize httpBasic here
                })
                .sessionManagement((session) -> session
                .sessionCreationPolicy(SessionCreationPolicy.STATELESS));

        return http.build();
    }
To allow multiple authorities to use hasAnyAuthority instead of hasAuthority. For example:
.requestMatchers(HttpMethod.DELETE, "/users/**").hasAnyAuthority("DELETE_USER_AUTHORITY", "DELETE_ANYUSER_AUTHORITY")
I hope this tutorial was helpful to you.
Check the Spring Boot tutorials page to learn more about Spring Boot and Restful Web Services. You will also find there many Spring Boot video tutorials.
Nice post. Very detailed and very helpful.