In this tutorial, you will learn how to store Key-Value pairs in your apps local storage. For this purpose we will follow the next steps:
- Create new Flutter App,
- Get the dependency using pub get,
- Save data,
- Read data,
- Remove data.
1. Create a New Flutter Project
Go ahead and create a new Flutter app. If you don’t know how to create a project you can refer to the “Hello World App in Flutter” tutorial. For this tutorial we will use the initial app that Flutter creates by default.
2. Get the Dependency Using “pub get”
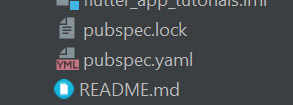
Normally, we would have to refer to native platform integrations for storing data on both iOS and Android. Fortunately, there is a plugin that can be used to persist key-value data in local storage. It’s called “shared_preferences”. The shared preferences plugin wraps NSUserDefaults on iOS and SharedPreferences on Android, providing a persistent store for simple data. Go ahead and open your “pubspec.yaml” file:
and under dependencies add shared_preferences: ^0.5.12+4 (this is the version used when making this tutorial):

To fetch shared_preferences dependency, press the “Pub get” button in your Android Studio, or in your terminal windows write the following command “flutter pub get”. Once done we can go ahead and import the dependency in our code and use it.
3. Save Data
To save data in local storage using the shared_preferences plugin, all we need is the next few lines of code:
_incrementCounter() async {
  SharedPreferences prefs = await SharedPreferences.getInstance();
  setState(() {
    _counter = (prefs.getInt('counter') ?? 0) + 1;
    prefs.setInt('counter', _counter);
  });
}
As you can see we are using the default function to increment the counter and simply storing it in our apps local storage. To save data, we use the setter methods provided by the SharedPreferences class. Setter methods are available for various primitive types, such as setInt, setBool, and setString.
4. Read Data
To read the data from local storage we will create another function which you can see in the code below:
_loadCounter() async {
  SharedPreferences prefs = await SharedPreferences.getInstance();
  setState(() {
    _counter = (prefs.getInt('counter') ?? 0);
  });
}
To read data, use the appropriate getter method provided by the SharedPreferences class. For each setter there is a corresponding getter. After creating this function we will call it in our “initState()” void like so:
@override
void initState() {
  super.initState();
  _loadCounter();
}
Basically every time the widget is built the “_loadCounter” function will be called, which in return will give us the saved data.
5. Remove Data
For this purpose I have created a button which will have the following code:
FlatButton(
  color: Colors.teal,
  textColor: Colors.white,
  onPressed: ()async {
   SharedPreferences prefs = await SharedPreferences.getInstance();

    prefs.remove('counter');
  },
  child: Text('RESET'),
)
As you can see to remove data we simply use the remove() method from the SharedPreferences class, and we pass the key that we have saved, which in our case is the “counter“.
Examples of use
Most common use would be in saving simple data like theme settings, user settings etc. It is not recommended to use it to store sensitive data like passwords and other personal data.
Although key-value storage is easy and convenient to use, it has limitations. It can only store primitive types cane be used, like bool, int, double, string and stringList and its not designed to store a lot of data.
Complete Code Example
Below is the entire app code for your reference and use.
import 'package:flutter/material.dart';
import 'package:shared_preferences/shared_preferences.dart';

void main() => runApp(MyApp());

class MyApp extends StatelessWidget {
  // This widget is the root of the application.
  @override
  Widget build(BuildContext context) {
    return MaterialApp(
      debugShowCheckedModeBanner: false,
      title: 'Shared preferences demo',
      theme: ThemeData(
        primarySwatch: Colors.teal,
      ),
      home: MyHomePage(title: 'Shared preferences demo'),
    );
  }
}

class MyHomePage extends StatefulWidget {
  MyHomePage({Key key, this.title}) : super(key: key);
  final String title;

  @override
  _MyHomePageState createState() => _MyHomePageState();
}

class _MyHomePageState extends State<MyHomePage> {
  int _counter = 0;

  @override
  void initState() {
    super.initState();
    _loadCounter();
  }

  //Loading counter value on start
  _loadCounter() async {
    SharedPreferences prefs = await SharedPreferences.getInstance();
    setState(() {
      _counter = (prefs.getInt('counter') ?? 0);
    });
  }

  //Incrementing counter after click
  _incrementCounter() async {
    SharedPreferences prefs = await SharedPreferences.getInstance();
    setState(() {
      _counter = (prefs.getInt('counter') ?? 0) + 1;
      prefs.setInt('counter', _counter);
    });
  }

  @override
  Widget build(BuildContext context) {
    return Scaffold(
      appBar: AppBar(
        title: Text(widget.title),
      ),
      body: Center(
        child: Column(
          mainAxisAlignment: MainAxisAlignment.center,
          children: <Widget>[
            Text(
              'You have pushed the button this many times:',
            ),
            Text(
              '$_counter',
              style: Theme.of(context).textTheme.headline4,
            ),
            FlatButton(
              color: Colors.teal,
              textColor: Colors.white,
              onPressed: ()async {
               SharedPreferences prefs = await SharedPreferences.getInstance();

                prefs.remove('counter');
              },
              child: Text('RESET'),
            )
          ],
        ),
      ),
      floatingActionButton: FloatingActionButton(
        onPressed: _incrementCounter,
        tooltip: 'Increment',
        child: Icon(Icons.add),
      ), // This trailing comma makes auto-formatting nicer for build methods.
    );
  }
}
I hope this Flutter tutorial was helpful for you. If you are interested in learning Flutter, please check other Flutter tutorials on this site. Some of them have video tutorials included.
Happy learning Flutter!