In this tutorial, we will explore one of the many ways to display images in Flutter. Specifically, we will learn how to create an image with rounded corners, a popular design element in modern mobile applications.
Before diving into the main topic, it is important to note that Flutter offers a variety of options for displaying images. You can choose to display an image from a local file or a network URL, and there are different widget classes available for each use case. For the purpose of this tutorial, we will focus on fetching an image from a remote URL.
Simple code example
To begin, we will use a simple code example to demonstrate how to fetch an image from a remote URL and display it in your Flutter mobile app. Here is the code:
import 'package:flutter/material.dart';

void main() => runApp(MyApp());

class MyApp extends StatelessWidget {
  @override
  Widget build(BuildContext context) {
    var title = 'Web Images';

    return MaterialApp(
      title: title,
      home: Scaffold(
        appBar: AppBar(
          title: Text(title),
        ),
        body: Image.network(
          'https://picsum.photos/250?image=9',
          fit: BoxFit.cover,
        ),
      ),
    );
  }
}
If you run this code example, an image will appear with its original shape and edges. If the image has sharp corners, those corners will be displayed as sharp in your Flutter mobile app. However, if you want to give your app a more modern and polished look, you may want to consider rounding the corners of your images.
Making Corners Rounded
If you want to create an image with rounded corners in your Flutter mobile app, you can easily achieve this by using the ClipRRect widget. The ClipRRect widget is designed to clip its child to a rounded rectangle shape, which can be customized by setting the borderRadius parameter.
If you are familiar with CSS, you will find that the borderRadius parameter in Flutter works exactly the same as it does in CSS. You can set the borderRadius to a specific value or use shorthand notation to set different values for each corner.
To create an image with rounded corners using the ClipRRect widget, simply pass the image you want to clip as a child of the ClipRRect widget. The child property of the ClipRRect widget should contain the image that you want to display with rounded corners.
ClipRRect(
          borderRadius: BorderRadius.circular(10),
          child: Image.network(
          'https://picsum.photos/250?image=9',
          fit: BoxFit.cover,
        ),
Let’s have a look at a complete code example that will fetch an image from a remote URL and will display it with rounded corners.
Complete Code Example
import 'package:flutter/material.dart';

void main() => runApp(MyApp());

class MyApp extends StatelessWidget {
  @override
  Widget build(BuildContext context) {
    var title = 'Web Images';

    return MaterialApp(
      title: title,
      home: Scaffold(
        appBar: AppBar(
          title: Text(title),
        ),
        body: ClipRRect(
          borderRadius: BorderRadius.circular(10),
          child: Image.network(
          'https://picsum.photos/250?image=9',
          fit: BoxFit.cover,
        ),
        ),
      ),
    );
  }
}
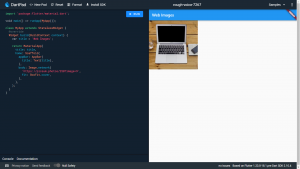
Output:

I hope this Flutter tutorial was helpful for you. If you are interested in learning Flutter, please check other Flutter tutorials on this site. Some of them have video tutorials included.
Happy mobile app development with Flutter 🙂!