In this tutorial, you will learn how to create “Tabs” or “Tab Bar” in Flutter. For this purpose we will follow the next steps:
- Create a new Flutter app,
- Create the Tab Controller,
- Create the Tabs Content.
1. Create a New Flutter Project
Go ahead and create a new Flutter app. If you don’t know how to create a project you can refer to the “Hello World App in Flutter” tutorial. Once you have the app created delete all the comments and content until you have only the following code left:
import 'package:flutter/material.dart';
void main() {
runApp(MaterialApp(
home: HomeScreen(),
));
}
class HomeScreen extends StatefulWidget {
@override
_HomeScreenState createState() {
return _HomeScreenState();
}
}
class _HomeScreenState extends State<HomeScreen> {
@override
Widget build(BuildContext context) {
return SafeArea(
child: Scaffold(
appBar: AppBar(
title: Text('Home Screen'),
backgroundColor: Colors.teal,
),
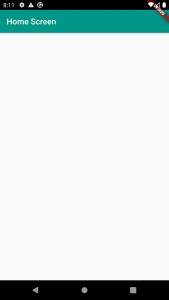
body: Center(),
),
);
}
}
The output will look like this:
Next, we will work on the Tab Controller.
2. Create a TabController and Tabs
TabController is a native widget available in Flutter that manages the selection of tabs between the TabBar, responsible for navigation, and the TabBarView, responsible for displaying the content of each tab. The creation of the TabController is straightforward. You can wrap the Scaffold widget with the DefaultTabController widget in the HomeScreen widget of your application, as shown in the following example:
child: DefaultTabController(
  length: 3,
  child: Scaffold(
    appBar: AppBar(
      title: Text('Home Screen'),
      backgroundColor: Colors.teal,
    ),
    body: Center(

    ),
  ),
),
In the code snippet, it is evident that I enclosed the Scaffold widget and defined the length of the TabController. The purpose of the length parameter is to indicate the total number of tabs that will be utilized in the application. To exhibit the tabs, you can navigate to the AppBar widget and include the following code:
bottom: TabBar(
  tabs: [
    Icon(Icons.home),
    Icon(Icons.info_outline),
    Icon(Icons.settings),
  ],
  indicatorColor: Colors.white,
),
The AppBar has a “bottom” attribute that we can utilize to show the TabBar containing the Tabs that we plan to use. The resulting display is demonstrated below:
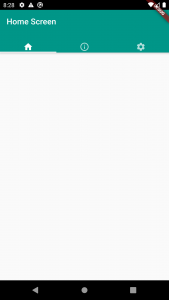
As evident from the output, the tabs are positioned below the AppBar’s title, and each tab is clickable. However, currently, selecting a tab doesn’t display any content. In the next step, we will incorporate the necessary content for each tab.
3. Create the Tabs content
In order to display the content of the Tabs, we need to use the TabBarView widget. We need to use it in the body of the Scaffold. The TabBarView needs to have the exact number of children widgets as the TabController length, otherwise, it will not compile and will not render a view. Here is our example:
body: TabBarView(
  children: [
    Icon(Icons.home),
    Icon(Icons.info_outline),
    Icon(Icons.settings),
  ],
),
As you can see we used three children for the TabBarView and they will all be the same Icon widgets that we used in the TabBar. Every time we press a tab the view will change. Here is the output of the code:

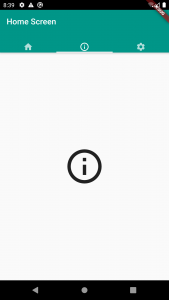
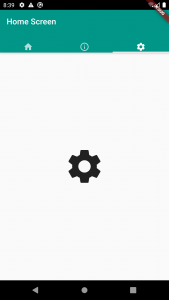
The content can be any widget that your app requires.
Navigate between tabs programmatically
To navigate between tabs programmatically, you can use the TabController class. This class allows you to programmatically select a tab by index or by the corresponding Tab object. You can create a TabController by calling the TabController constructor and passing in the number of tabs and the parent widget’s State object. For example, to select the second tab programmatically, you could add the following code to the _TabScreenState class:
TabController _tabController;

@override
void initState() {
  super.initState();
  _tabController = TabController(length: 2, vsync: this);
}

@override
void dispose() {
  _tabController.dispose();
  super.dispose();
}

void selectTab(int tabIndex) {
  _tabController.animateTo(tabIndex);
}
Then, you could call the selectTab method with the index of the desired tab:
selectTab(1); // select the second tab
How do I add more tabs to the TabBar?
To add more tabs to the TabBar, you can simply add additional Tab widgets to the tabs list in the TabBar. For example, if you wanted to add a third tab with a “Profile” label and icon, you could add the following code to the tabs list:
Tab(
  icon: Icon(Icons.person),
  text: 'Profile',
),