RESTful web services use HTTP methods and representations to manage resources. In order to properly handle these resources, it’s important to understand how to define the expected behaviour of an endpoint in terms of the HTTP request and response, including specifying request methods, headers, and media types.
By using Spring’s @RequestMapping annotation, we can map an HTTP request to a method in a controller and specify how the request should be handled, such as what HTTP method is allowed, what headers are required, and what media types can be consumed or produced.
Why Do We Use the @RequestMapping Annotation?
The @RequestMapping annotation is a core annotation in Spring Boot that is used to map a specific HTTP request method to a specific Java method in a web application. This means that when a request is sent to the web application, Spring Boot will use the @RequestMapping annotation to determine which Java method should handle the request.
The @RequestMapping annotation can be used to specify the request type (GET, POST, PUT, DELETE) and the corresponding method that will handle the request. For example, if a developer wants to handle a GET request to the /users URL path, they can annotate the Java method that should handle the request with @RequestMapping(value = "/users", method = RequestMethod.GET). This will tell Spring Boot that this Java method should handle GET requests to the /users path.
The @RequestMapping annotation is commonly used in RESTful web services to map HTTP request methods to specific Java methods that handle those requests. For example, a GET request to the /users URL path can be used to retrieve a list of users from a database, while a POST request to the same URL path can be used to create a new user in the database.
By using the @RequestMapping annotation, you can create powerful and flexible request mappings that can handle a wide variety of requests and parameters. Additionally, Spring Boot provides other related annotations, such as @GetMapping, @PostMapping, and @DeleteMapping, that are shorthand annotations for the @RequestMapping annotation with a specific HTTP method.
It’s worth noting that the @RequestMapping annotation is usually used at class-level to define the root URL for a controller, while the shorthand annotations are used at method-level to specify the HTTP request method and the path for the endpoint. You can learn more about these annotations in this tutorial Spring Annotations @PostMapping, @GetMapping, @PutMapping and @DeleteMapping.
Attributes of the @RequestMapping Annotation
When using the @RequestMapping annotation at method-level in a Spring Boot application, the annotation provides a number of attributes that can be used to customize the behavior of a request mapping. Some of the commonly used attributes are:
value: This attribute specifies the URL path that the request mapping should apply to. For example,@RequestMapping("/users")would match any request with the URL path “/users”.method: This attribute specifies the HTTP method that the request mapping should apply to. It can take aRequestMethodvalue such asGET,POST,PUT,DELETE, etc. For example,@RequestMapping(value = "/users", method = RequestMethod.GET)would match any GET request with the URL path “/users”.params: This attribute specifies the request parameter conditions that should be met for the request mapping to be considered a match. For example,@RequestMapping(value = "/users", params = "id")would match any request with a URL path of “/users” that has an “id” parameter.headers: This attribute specifies the request header conditions that should be met for the request mapping to be considered a match. For example,@RequestMapping(value = "/users", headers = "Content-Type=text/plain")would match any request with a URL path of “/users” that has aContent-Typeheader oftext/plain.consumes: This attribute specifies the media type(s) that the request can consume. For example,@RequestMapping(value = "/users", consumes = "application/json")would match any request with a URL path of “/users” that has aContent-Typeheader ofapplication/json.produces: This attribute specifies the media type(s) that the request can produce. For example,@RequestMapping(value = "/users", produces = "application/json")would match any request with a URL path of “/users” that has anAcceptheader ofapplication/json.
These attributes can be used individually or in combination to create powerful and flexible request mappings in a Spring Boot application.
@RequestMapping Above Controller Class
The @RequestMapping annotation is usually applied at the class level to specify a base path that applies to all the request-handling methods in the class. This can help to simplify the mapping of URLs by eliminating the need to specify the same base path for every method individually.
Take a look at the code example below:
package com.example.demo;

import org.springframework.beans.factory.annotation.Autowired;
import org.springframework.http.ResponseEntity;
import org.springframework.web.bind.annotation.*;

import java.net.URI;
import java.util.Optional;


@RestController // This means that this class is a REST Controller
@RequestMapping("/users") // This means URL's start with /demo (after Application path)
public class MainController {
    @Autowired // This means to get the bean called userRepository
    // Which is auto-generated by Spring, we will use it to handle the data
    private UserRepository userRepository;

    @PostMapping // Map ONLY POST Requests
    public ResponseEntity<User> addNewUser (@RequestBody User user) {

        User savedUser = userRepository.save(user);
        return ResponseEntity.created(URI.create("/" + savedUser.getId())).body(savedUser);
    }

    @GetMapping("/{id}")
    public ResponseEntity<Optional<User>> getUserById(@PathVariable Integer id) {

        Optional<User> user = userRepository.findById(id);
        return ResponseEntity.ok(user);
    }
}
In this code example, the @RequestMapping("/users") annotation is used to map all URLs starting with "/users" to this controller.
The @PostMapping annotation is used to map the HTTP POST method to the addNewUser method. This method creates a new user with the provided information and returns a ResponseEntity with the saved user’s details and a URI pointing to the newly created resource.
The @RequestBody annotation is used to indicate that the User object in the method parameter should be deserialized from the request body. This means that when a client sends a POST request with a User object in the request body, Spring will automatically deserialize the User object from the request body and pass it to the addNewUser method as a parameter.
The @GetMapping("/{id}") annotation is used to map the HTTP GET method to the getUserById method. This method retrieves the user with the specified id and returns a ResponseEntity with the user’s details.
The @PathVariable annotation is used to indicate that the id parameter should be extracted from the URL path. This means that when a client sends a GET request with a URL like "/users/1", Spring will extract the "1" from the URL and pass it to the getUserById method as the id parameter.
@RequestMapping and URL Path
Specify URL Path
Using the value attribute of @RequestMapping, you can specify a path for your method. This path will be appended to the base URL of your application to form the complete URL for your request-handling method. For example, let’s create a REST controller class to demonstrate how to use the value attribute of @RequestMapping:
package com.example.demo;

import org.springframework.beans.factory.annotation.Autowired;
import org.springframework.http.ResponseEntity;
import org.springframework.web.bind.annotation.*;

import java.net.URI;
import java.util.Optional;

@RestController
public class MainController {
    @Autowired
    private UserRepository userRepository;

    @RequestMapping(value="/users", method=RequestMethod.GET)
    public ResponseEntity<Iterable<User>> getAllUsers() {

        Iterable<User> users = userRepository.findAll();
        return ResponseEntity.ok(users);
    }

}
The @RequestMapping annotation is used in this code example to map the URL path “/users” to the getAllUsers method. This method is responsible for retrieving all users from the database using the userRepository.findAll() method. By using this annotation, we’re telling Spring that this method should handle HTTP requests that have a URL path of “/users”.
To specify that this method should handle HTTP GET requests, the RequestMethod.GET parameter is added to the @RequestMapping annotation. This parameter tells Spring that this method should only handle GET requests and ignore requests with other HTTP methods, such as POST or DELETE.
The getAllUsers method returns a ResponseEntity object containing the list of users retrieved from the database and a HTTP status code of 200 (OK). The ResponseEntity is used to provide additional information about the HTTP response, such as headers and status codes. In this case, the HTTP status code of 200 indicates that the request was successful and the response body contains the list of users.
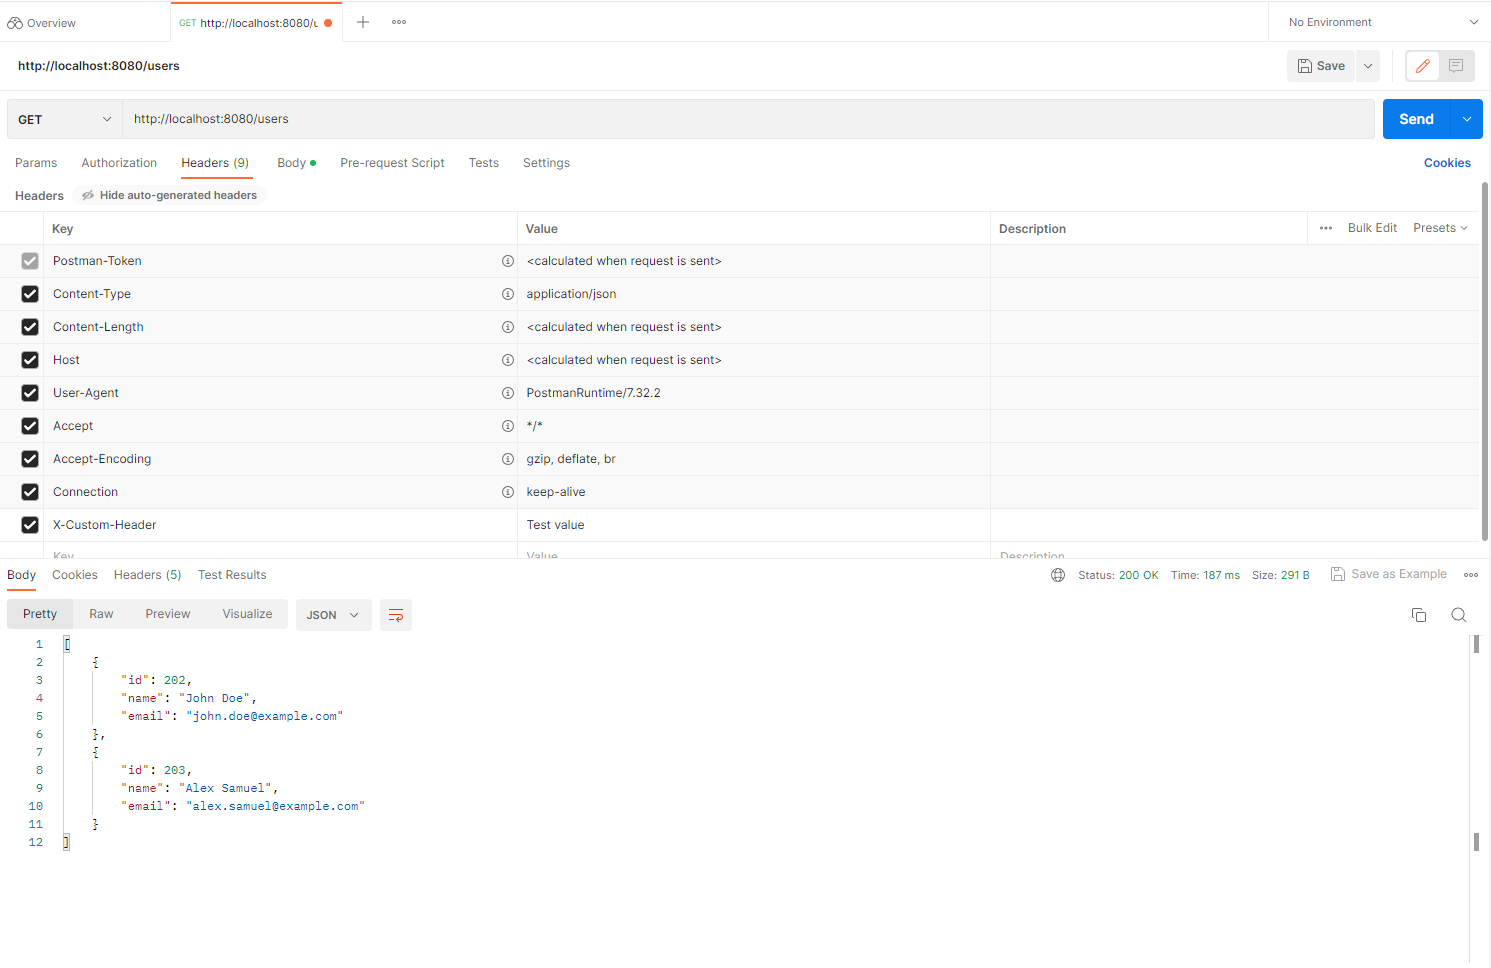
Let’s test our controller method using Postman. You can find detailed steps about how to use Postman for testing API endpoints in the following tutorial Testing the project using Postman.

As you can see, our controller method is working as expected, as we are able to retrieve the users from the database and return them as a response.
Specify Request Parameters
The @RequestMapping annotation can also be used to specify request parameters for your request handling method. Request parameters are key-value pairs that are appended to the end of a URL and are used to pass additional data to the server. Here’s an example:
package com.example.demo;

import org.springframework.beans.factory.annotation.Autowired;
import org.springframework.http.ResponseEntity;
import org.springframework.web.bind.annotation.*;

import java.net.URI;
import java.util.Optional;

@RestController
public class MainController {
    @Autowired
    private UserRepository userRepository;

    @RequestMapping(value = "/users", method = RequestMethod.GET, params = "id")
    public ResponseEntity<User> getUserById(@RequestParam("id") Integer id) {
        Optional<User> user = userRepository.findById(id);
        if (user.isPresent()) {
            return ResponseEntity.ok(user.get());
        } else {
            return ResponseEntity.notFound().build();
        }
    }

}
In this example, the params attribute is used to specify that this method should only handle GET requests with a id parameter. The @RequestParam annotation is used to extract the id parameter from the request and pass it to the getUserById method as a parameter. This method retrieves the user with the specified id from the database and returns a ResponseEntity object containing the user’s details.
Let’s try to invoke this method using a valid user id. As we know from the previous example, there is a user with id 202 in our database.
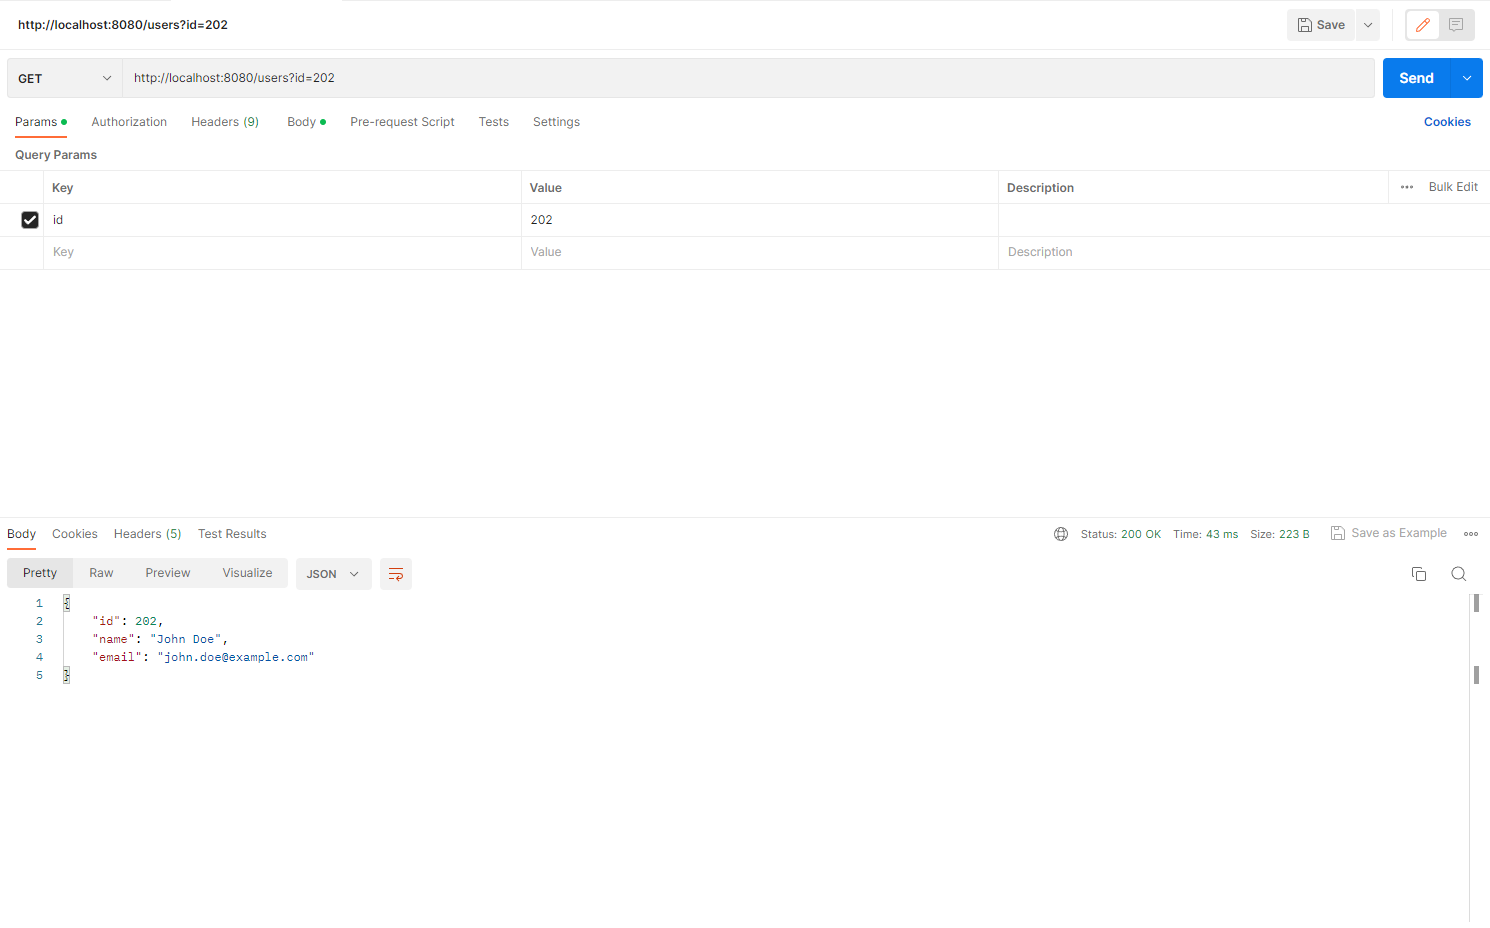
Now, let’s do the same thing again but with an invalid user id this time:
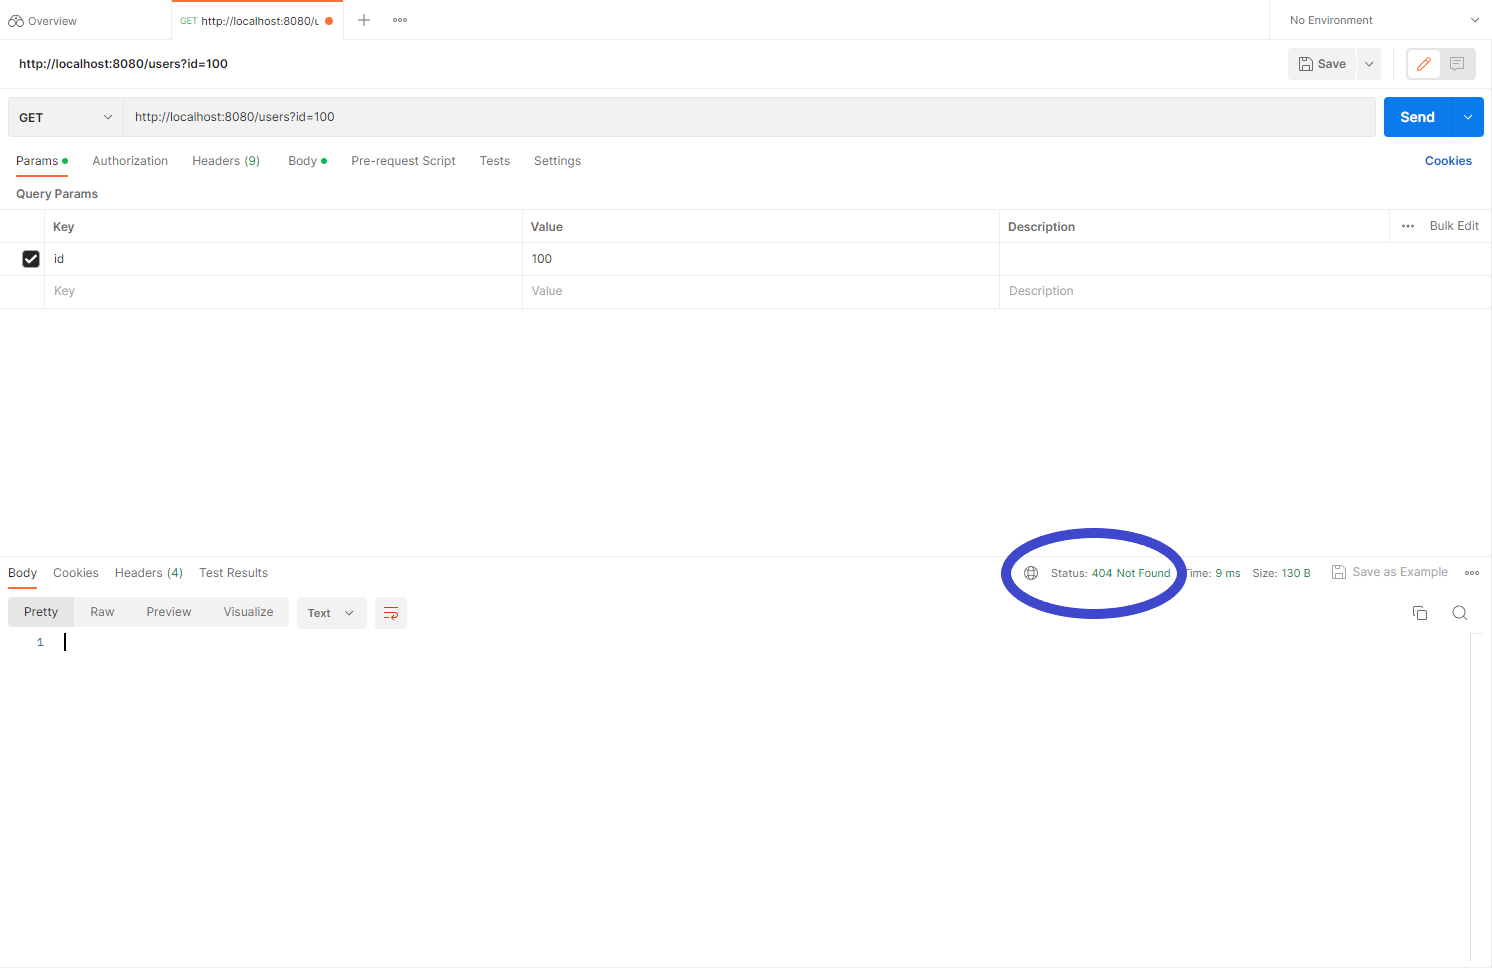
As you can see, we get a 404 Not Found status code, because we have used ResponseEntity.notFound().build(). The notFound() method creates a builder object that allows for further customization of the response entity, and the build() method creates and returns the final ResponseEntity object.
Specify Headers
The @RequestMapping annotation can also be used to specify headers for a particular request mapping. Headers can be used to provide additional information about a request or to enforce certain requirements on the request. Here’s an example of how to specify headers in a @RequestMapping annotation:
package com.example.demo;

import org.springframework.beans.factory.annotation.Autowired;
import org.springframework.http.ResponseEntity;
import org.springframework.web.bind.annotation.*;

import java.net.URI;
import java.util.Optional;

@RestController
public class MainController {
    @Autowired
    private UserRepository userRepository;

    @RequestMapping(value="/users", method=RequestMethod.GET, headers="X-Custom-Header")
    public ResponseEntity<Iterable<User>> getAllUsers() {

        Iterable<User> users = userRepository.findAll();
        return ResponseEntity.ok(users);
    }
}
In order to test our controller method with a custom header, we should add a header with a key of X-Custom-Header and a value of Test value for example.
Let’s see what we would get as a response if we removed or unchecked the X-Custom-Header header:

The server responded with a 400 Bad Request status code since the request does not meet the expected header requirement specified in the @RequestMapping annotation.
Specify Content Type with “consumes” and “produces”
@RequestMapping annotation in Spring supports consumes and produces attributes to specify the request payload and the response type of the HTTP request, respectively. This is particularly useful in RESTful web services, where the client and server agree upon the type of data exchanged using the Content-Type and Accept HTTP headers.
The consumes attribute is used to specify the media type of the request payload that the server can consume. It takes a single argument which is a string representing a single media type or a comma-separated list of media types that the controller method can consume. For example, if the controller method can only consume JSON, we can specify it as follows:
package com.example.demo;

import org.springframework.beans.factory.annotation.Autowired;
import org.springframework.http.ResponseEntity;
import org.springframework.web.bind.annotation.*;

import java.net.URI;
import java.util.Optional;

@RestController
public class MainController {
    @Autowired
    private UserRepository userRepository;

    @RequestMapping(value = "/users", method = RequestMethod.POST, consumes = "application/json")
    public ResponseEntity<User> addNewUser (@RequestBody User user) {

        User savedUser = userRepository.save(user);
        return ResponseEntity.created(URI.create("/" + savedUser.getId())).body(savedUser);
    }
}
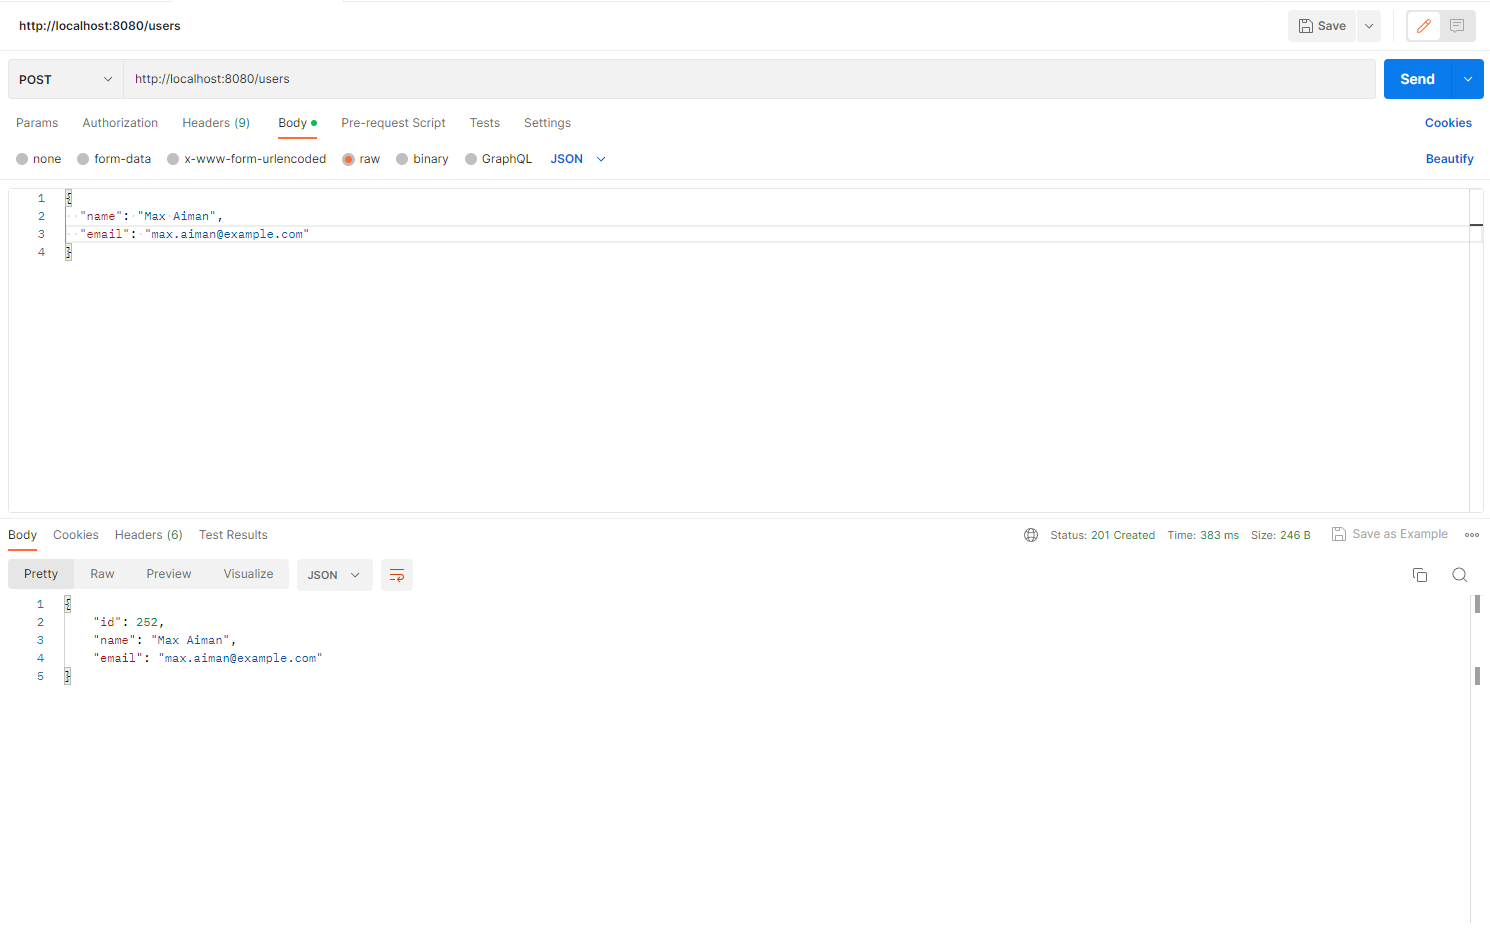
If we send a request with a JSON-formatted user, we will see that the user gets added without any problems as usual:
Now, let’s try sending an XML-formatted user and see what the server response would be:
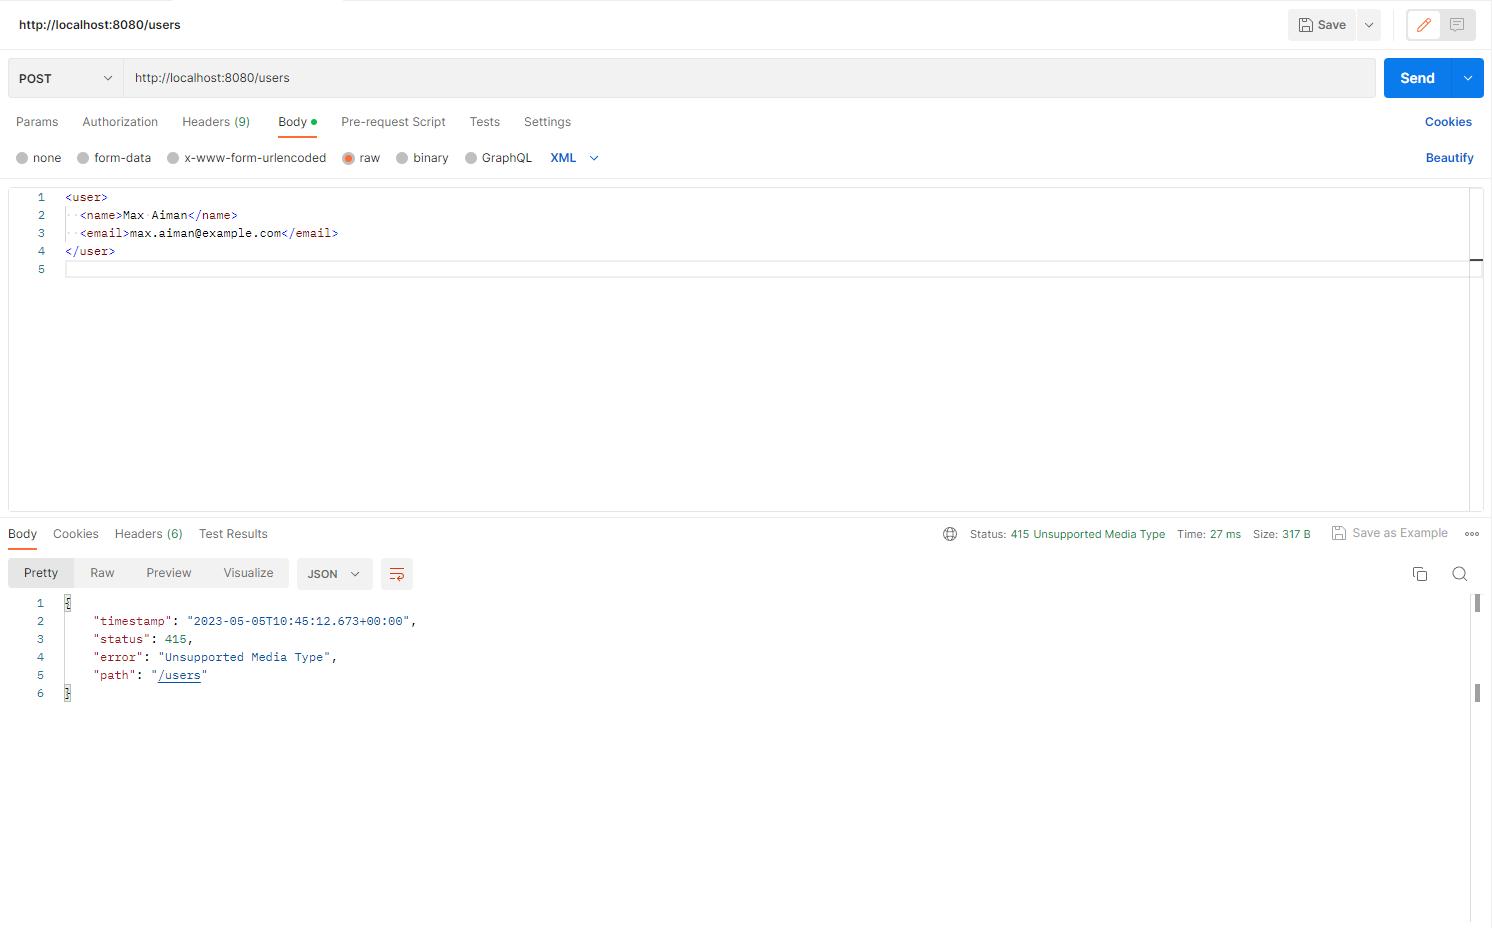
We got an HTTP 415 Unsupported Media Type response, because the request payload type is not compatible with the media type that the addNewUser controller method consumes.
The produces attribute is used to specify the media type of the response payload that the server can produce. It takes a comma-separated list of media types that the controller method can produce.
When a client sends a request, it includes the Accept header to indicate the media types it can accept in the response. If the client can accept any media type, it sets the Accept header to "*/*". When the server receives the request, it determines the best media type to return in the response based on the Accept header and the produces attribute of the controller method.
If the produces attribute is not set, the controller method can produce any media type. If the client does not specify an Accept header, the server can return any media type it wants.
For example, if the controller method can only produce XML payloads, we can specify it as follows:
package com.example.demo;

import org.springframework.beans.factory.annotation.Autowired;
import org.springframework.http.ResponseEntity;
import org.springframework.web.bind.annotation.*;

import java.net.URI;
import java.util.Optional;

@RestController
public class MainController {
    @Autowired
    private UserRepository userRepository;

    @RequestMapping(value = "/users", method = RequestMethod.GET, produces = "application/xml")
    public ResponseEntity<Iterable<User>> getAllUsers() {

        Iterable<User> users = userRepository.findAll();
        return ResponseEntity.ok(users);
    }
}
Make sure to add the following dependency to your pom.xml file in order for your application to support XML data type:
<dependency>
   <groupId>com.fasterxml.jackson.dataformat</groupId>
   <artifactId>jackson-dataformat-xml</artifactId>
</dependency>
You should also add the Accept header, which we mentioned earlier, with a value of ‘application/xml’ in the request headers as shown below:
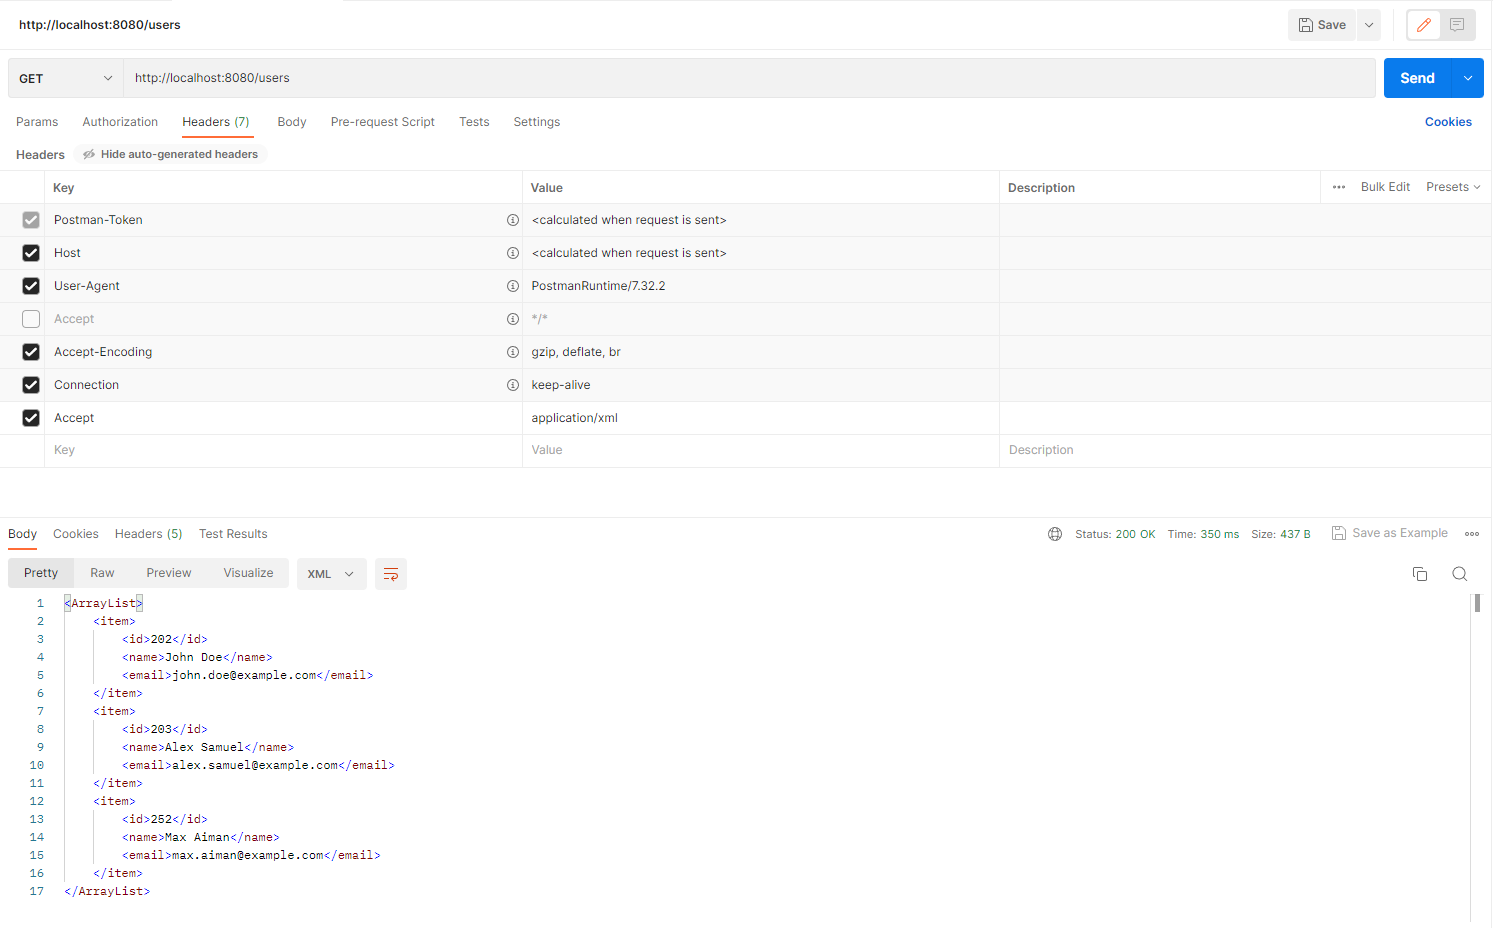
Now, let’s try specifying ‘application/json’ as a value of the Accept header and see what will happen when we send the request:
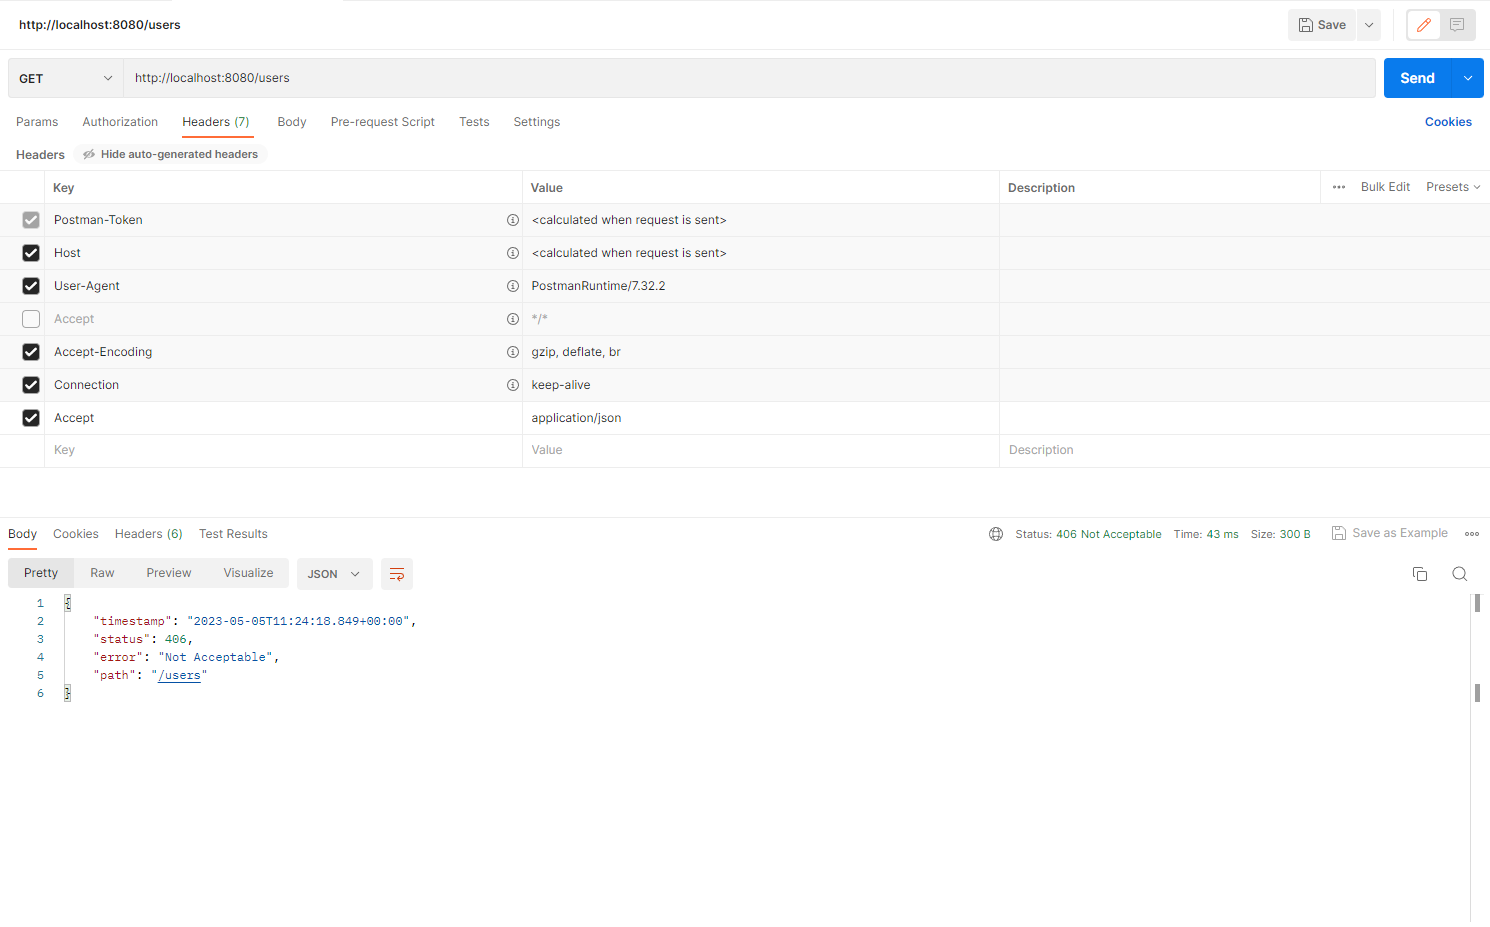
When we send an Accept header with a type that is not one of the types specified in ‘produces’, Spring returns an HTTP 406 Not Acceptable response, indicating that the server cannot produce a response matching the list of acceptable values defined in the request’s headers.
Conclusion
In conclusion, the @RequestMapping() annotation is a powerful tool in building RESTful web services with Spring Boot. By using this annotation, you can easily map your HTTP requests to specific methods in your controllers and customize various attributes such as URL paths, request parameters, headers, and content types.
With the help of this annotation, you can create a well-structured and organized web service that can handle various HTTP requests and return appropriate HTTP status codes. Make sure to visit the RESTful Web Services with Spring Boot page for more similar tutorials.