In this tutorial, you will learn how to customize UINavigationBar appearance programmatically within a UIViewController. You will use the new UINavigationBarAppearance introduced in iOS 15, but I will also provide a fallback for earlier versions.
Set the Navigation Bar Background and Title Color
For iOS 14 and Earlier
Before iOS 15, you would have to use the barTintColor property of the UINavigationBar to set its background color.
override func viewDidLoad() {
    super.viewDidLoad()

    // Set navigation bar background colour
    self.navigationController?.navigationBar.barTintColor = UIColor.cyan

    // Set navigation bar title text colour
    self.navigationController?.navigationBar.titleTextAttributes = [.foregroundColor: UIColor.white]
}
In the above code snippet, I set the barTintColor to cyan and the title text color to white within the viewDidLoad() method of your UIViewController.
Remember that if you want to apply the appearance globally to all navigation bars in your application, you should do so in the AppDelegate or a central place where your navigation controllers are initialized.
For iOS 15 and Newer
Starting with iOS 15, Apple introduced a new way to configure the appearance of the UINavigationBar using the UINavigationBarAppearance class. Here’s how you can use it:
if #available(iOS 15.0, *) {
  let appearance = UINavigationBarAppearance()
  appearance.configureWithOpaqueBackground()
  appearance.backgroundColor = UIColor.systemCyan
  appearance.titleTextAttributes = [.foregroundColor: UIColor.white] // Set Title text color
  navigationItem.standardAppearance = appearance
  navigationItem.scrollEdgeAppearance = appearance
  navigationItem.compactAppearance = appearance
}
In the above code snippet, I first check whether the iOS version is 15.0 or higher because the appearance API was introduced in iOS 15. You will need to handle the older versions separately due to differences in how the appearance is configured.
In this code snippet, I create a new UINavigationBarAppearance instance, configure it with an opaque background. Then sets the background color to cyan, and change the title text color to white text.

Set Navigation Bar ItemButton Tint Color
To customize the tint color of navigation bar items such as buttons, you can modify the tintColor property of the UINavigationBar. This property affects all bar button items in the navigation bar. The process of setting the tint color for navigation bar items remains consistent across older and newer iOS versions.
// Create a UIBarButtonItem
let rightBarButton = UIBarButtonItem(barButtonSystemItem: .add, target: self, action:.none)
self.navigationController?.navigationBar.tintColor = UIColor.red // Set tint color
self.navigationItem.rightBarButtonItem = rightBarButton // Assign the bar button item
First, create a UIBarButtonItem instance. Next, set the tintColor property of the navigation bar to the desired color. Finally, assign the newly created UIBarButtonItem to the rightBarButtonItem property of the navigationItem.

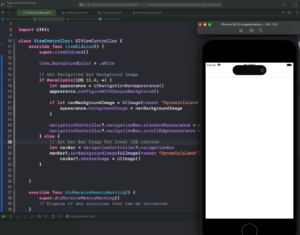
Set Navigation Bar Background Image
For iOS 15 and above, create a UINavigationBarAppearance object and configure it with an opaque background. This is necessary because the default appearance has a translucent background.
// Set Navigation Bar Background Image
if #available(iOS 15.0, *) {
  let appearance = UINavigationBarAppearance()
  appearance.configureWithOpaqueBackground()

  if let navBackgroundImage = UIImage(named: "DynamicIsland") {
    appearance.backgroundImage = navBackgroundImage
  }

   navigationController?.navigationBar.standardAppearance = appearance
   navigationController?.navigationBar.scrollEdgeAppearance = appearance
  } else {
  // Set Nav Bar Image For lower iOS version
  let navBar = navigationController?.navigationBar
  navBar?.setBackgroundImage(UIImage(named: "DynamicIsland"), for: .default)
  navBar?.shadowImage = UIImage()
}
Next, load the image you want to use as the background from your assets using UIImage. Assign this image to the backgroundImage property of the appearance object.
Then, set both the standardAppearance and scrollEdgeAppearance properties of the navigationBar to the appearance object you have configured.
For iOS versions below 15, you cannot use the new appearance APIs. Instead, use the setBackgroundImage(_:for:) method to set the background image directly on the navigation bar. Additionally, remove the shadow image to ensure the image looks seamless.
Conclusion
I hope this tutorial was helpful to you. You now know how to Customize Navigation Bar Appearance Programmatically in UIViewController.
For more Swift code examples and tutorials, please check the Swift Code Examples page on this website.
Happy learning!