In this tutorial, you will learn how to use Jackson ObjectMapper with Spring Boot application to serialize and deserialize Java objects.
Overview
In today’s time, the JSON format is one of the most popular formats to transfer and exchange data on the world wide web. Almost all RESTful web services support JSON as input and output structure. Additionally, It is also widely used by various NoSQL databases such as MongoDB to store records as well.
In this tutorial, we’ll deep-dive into Jackson ObjectMapper and discuss how to serialize JSON requests and responses in the Spring Boot application with various Jackson configurations.
Preparation:
In this example, I’ll be using the following tools:
- JDK 1.8
- Intellij Idea for IDE
- Maven
- Springboot Application version 2.5.5
- Lombok
Structure of the post :
The development outline of this blog will be as follow:
- Project Setup
- Introducing Jackson ObjectMapper
Step 1: Project setup
At first, we will create a simple Spring Boot based application. You can use the Spring Initializr page to create an initial project template.
After importing the project into IDE, we will be creating the following sub-packages inside our main package ‘com.appsdeveloperblog.ObjectMapperTutorial‘ :
- Config: This folder contains configuration class with filename ‘config.java’
- Controller: This folder contains class ‘EmployeeController‘ with filename ‘EmployeeController.java‘
- Model: This folder contains Employee DTO structure with filename ‘Employee.java‘
In the end, the final project structure will look like this:
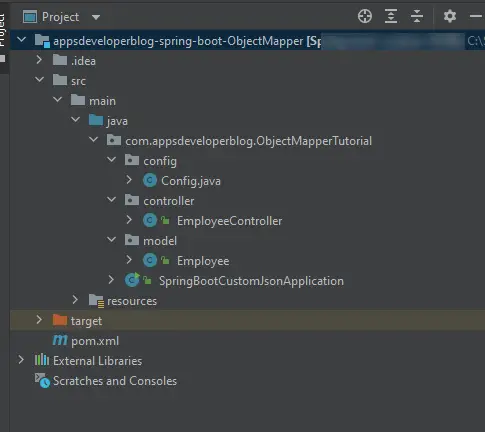
In the following sections, we will learn the components of config, controller classes in detail.
Maven Dependencies
We will only include spring-boot-starter-web and Lombok dependencies in our pom.xml. As, Spring Boot already provides managed dependencies for various Jackson modules. For example,
- jackson-core
- jackson-databind
- jackson-annotations
Hence, we don’t need to include this in pom.xml explicitly.
<?xml version="1.0" encoding="UTF-8"?>
<project xmlns="http://maven.apache.org/POM/4.0.0" xmlns:xsi="http://www.w3.org/2001/XMLSchema-instance"
    xsi:schemaLocation="http://maven.apache.org/POM/4.0.0 https://maven.apache.org/xsd/maven-4.0.0.xsd">
    <modelVersion>4.0.0</modelVersion>
    <parent>
        <groupId>org.springframework.boot</groupId>
        <artifactId>spring-boot-starter-parent</artifactId>
        <version>2.5.0</version>
        <relativePath/>
    </parent>
    <groupId>com.appsdeveloperblog.ObjectMapperTutorial</groupId>
    <artifactId>Spring-boot-custom-JSON</artifactId>
    <version>0.0.1-SNAPSHOT</version>
    <name>Jackson ObjectMapper Tutorial</name>
    <description>Jackson ObjectMapper Tutorial</description>
    <properties>
        <java.version>11</java.version>
        <maven.compiler.source>11</maven.compiler.source>
        <maven.compiler.target>11</maven.compiler.target>
    </properties>
    <dependencies>
        <dependency>
            <groupId>org.springframework.boot</groupId>
            <artifactId>spring-boot-starter-web</artifactId>
        </dependency>
        <dependency>
            <groupId>org.projectlombok</groupId>
            <artifactId>lombok</artifactId>
            <version>1.18.20</version>
        </dependency>
    </dependencies>
    <build>
        <plugins>
            <plugin>
                <groupId>org.springframework.boot</groupId>
                <artifactId>spring-boot-maven-plugin</artifactId>
            </plugin>
        </plugins>
    </build>

</project>
Create Employee POJO
Now, we create our simple POJO class which we will be using in our project. Here we are using the “Employee” object with basic member fields like ID, FirstName etc.
Here is the code for ‘Employee.java’
package com.appsdeveloperblog.ObjectMapperTutorial.model;

import lombok.AllArgsConstructor;
import lombok.Getter;
import lombok.Setter;

import java.io.Serializable;
import java.util.ArrayList;
import java.util.List;


@AllArgsConstructor
@NoArgsConstructor
@Getter
@Setter
public class Employee {

    private int id;
    private String firstName;
    private String jobTitle;
    private String gender;


    public static java.util.List<Employee> getEmployee() {
        List<Employee> employees = new ArrayList<>();
        employees.add(new Employee(1, "damian", "Developer", "Male"));
        employees.add(new Employee(2, "noel", "Developer", "Male"));
        employees.add(new Employee(3, "amena", "CEO", "Female"));
        employees.add(new Employee(4, "eugenia", "Developer", "Male"));
        employees.add(new Employee(5, "mckee", "Developer", "Female"));
        employees.add(new Employee(6, "ayers", "Developer", "Female"));
        return employees;
    }

}
Create Controller
Next, we need the controller for GET and POST services.
The complete source code for “EmployeeController.java” is as follow:
package com.appsdeveloperblog.ObjectMapperTutorial.controller;

import com.appsdeveloperblog.ObjectMapperTutorial.model.Employee;
import org.springframework.web.bind.annotation.*;

import java.util.List;

@RestController
public class EmployeeController {

    @RequestMapping("/getEmployees")
    public List<Employee> getEmployees() {
        return Employee.getEmployee();
    }

    @PostMapping("/createEmployees")
    @ResponseBody
    public Employee createProduct(@RequestBody Employee employee) {
        /* sample logic to show employee object enhancement*/
        employee.setID(employee.getID() + 100);
        employee.setJobTitle("software " + employee.getJobTitle());

        return employee;
    }
}
Running the Application
Now, we can create the main class to start the Spring Boot Application:
package com.appsdeveloperblog.ObjectMapperTutorial;

import org.springframework.boot.SpringApplication;
import org.springframework.boot.autoconfigure.SpringBootApplication;

@SpringBootApplication
public class SpringBootCustomJsonApplication {
    public static void main(String[] args) {
        SpringApplication.run(SpringBootCustomJsonApplication.class, args);
    }
}
In the end, we will run our application either via executing the following command or using the ‘Run’ button from IDE. You will find that the application started on Tomcat port 8080.
To test GET we can simply execute the below URL:
http://localhost:8080/getEmployees
Subsequently, we will get the following response:

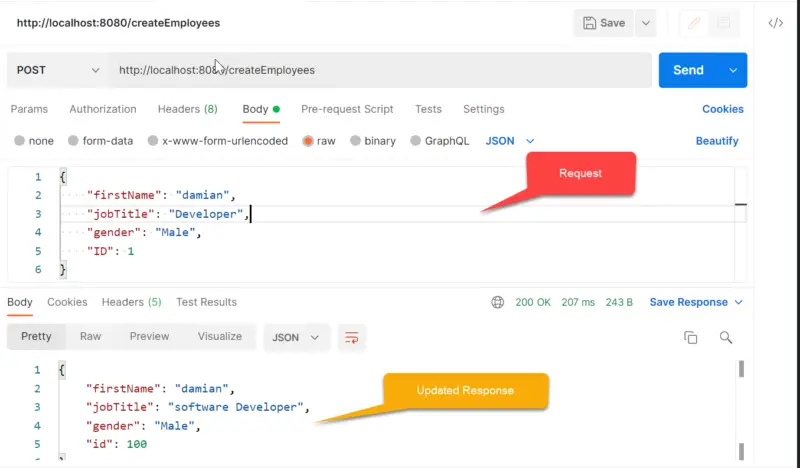
Similarly, if we do POST call using the below URL via Postman we should get the following response.
http://localhost:8080/createEmployees
Here is a sample request and response.
Now, we will see how to work with the Jackson object mapper in our project to convert a DTO object to a JSON and vice-versa.
Step2: Introducing Jackson ObjectMapper
In the previous example, we already saw a basic version of ObjectMapper functionality even though we have not created an instance of it. Let see how it has happened sequentially as following:
During HTTP GET request:
- We requested a GET call via “/getEmployees” in the browser.
- Controller returned a list of Employee DTO objects.
- Spring internally created ObjectMapper instance and converted the employee objects to JSON.
This process is called Serialization because spring converted the list of employee object to JSON.
During HTTP POST request:
- We send a POST request via “/createEmployees” from Postman using JSON request payload.
- In Controller, Spring automatically converted the requested JSON into Employee DTO object.
- Employee DTO was modified as per logic and returned to the controller.
- Spring again converted returned received “Employee” object DTO to JSON and presented to the client as JSON response.
This process of converting JSON payload to java object is called Deserialization.
Customizing ObjectMapper
In this section, we’ll learn how to customize the default ObjectMapper behaviour so based on requirement we can change the Serialization/Deserialization.
Example 1:
Firstly, we will create a bean inside our config folder as “Config.java”
package com.appsdeveloperblog.ObjectMapperTutorial.config;

import com.fasterxml.jackson.annotation.JsonInclude;
import com.fasterxml.jackson.databind.ObjectMapper;
import com.fasterxml.jackson.databind.PropertyNamingStrategy;
import org.springframework.context.annotation.Bean;
import org.springframework.context.annotation.Configuration;
import org.springframework.context.annotation.Primary;
import org.springframework.http.converter.json.Jackson2ObjectMapperBuilder;


@Configuration
class WebConfig {
    @Bean
    @Primary
    public ObjectMapper customJson(){
        return new Jackson2ObjectMapperBuilder()
                .indentOutput(true)
                .serializationInclusion(JsonInclude.Include.NON_NULL)
                .propertyNamingStrategy(PropertyNamingStrategy.UPPER_CAMEL_CASE)
                .build();
    }
}
Now if we run our project again and execute GET /getEmployees , we will see the following output.
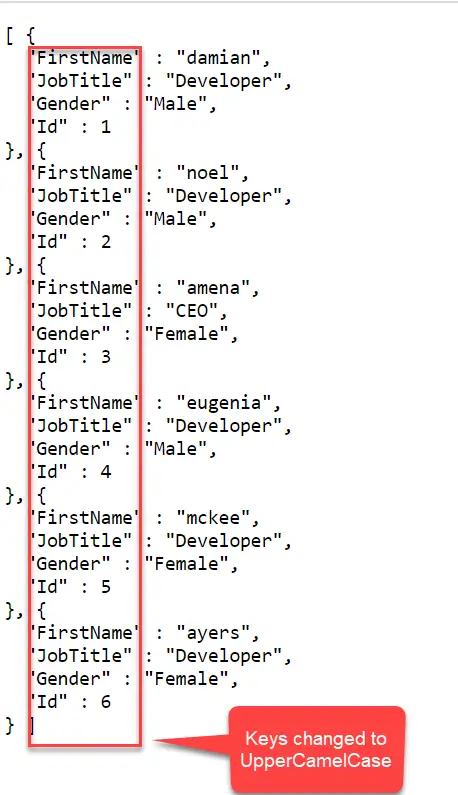
If you have noticed, we have configured ObjectMapper to indent the output response. Additionally, we have requested ObjectMapper to convert names to upper case. Hence, now all keys are in camelcase format and output is indented as well after POJO conversion.
Example 2:
Sometimes we have a use-case, where API send additional field JSON than expected in the internal java objects structure. In this case, we can use the ObjectMapper feature to have stricter checks during serialization to throw exceptions on such cases.
To achieve this, we can modify our config class a below:
package com.appsdeveloperblog.ObjectMapperTutorial.config;

import com.fasterxml.jackson.annotation.JsonInclude;
import com.fasterxml.jackson.databind.DeserializationFeature;
import com.fasterxml.jackson.databind.ObjectMapper;
import com.fasterxml.jackson.databind.PropertyNamingStrategy;
import org.springframework.context.annotation.Bean;
import org.springframework.context.annotation.Configuration;
import org.springframework.context.annotation.Primary;
import org.springframework.http.converter.json.Jackson2ObjectMapperBuilder;


@Configuration
class WebConfig {
    @Bean
    @Primary
    public ObjectMapper objectMapper(Jackson2ObjectMapperBuilder builder) {
        ObjectMapper objectMapper = builder.createXmlMapper(false).build();
        objectMapper.configure(DeserializationFeature.FAIL_ON_UNKNOWN_PROPERTIES, true);
        return objectMapper;
    }
}
Now, we have introduced the object mapper property “DeserializationFeature.FAIL_ON_UNKNOWN_PROPERTIES” . Consequently, if we send any JSON keys which are not in the Employee object then ObjectMapper will throw an error as below.
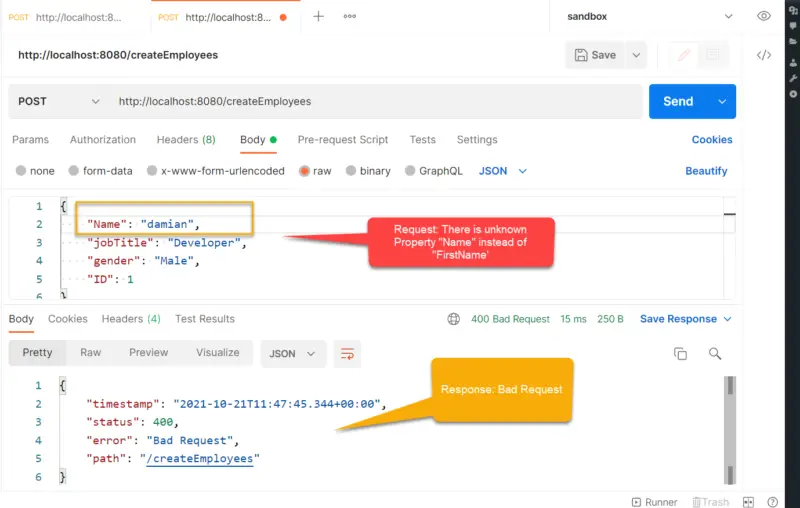
Error in the console is as follow:
2021-10-21 17:17:45.343  WARN 28108 --- [nio-8080-exec-4] .w.s.m.s.DefaultHandlerExceptionResolver : Resolved [org.springframework.http.converter.HttpMessageNotReadableException: JSON parse error: Unrecognized field "Name" (class com.appsdeveloperblog.ObjectMapperTutorial.model.Employee), not marked as ignorable; nested exception is com.fasterxml.jackson.databind.exc.UnrecognizedPropertyException: Unrecognized field "Name" (class com.appsdeveloperblog.ObjectMapperTutorial.model.Employee), not marked as ignorable (4 known properties: "gender", "firstName", "jobTitle", "id"])
 at [Source: (PushbackInputStream); line: 2, column: 14] (through reference chain: com.appsdeveloperblog.ObjectMapperTutorial.model.Employee["Name"])]
There are many such properties that can be configured on ObjectMapper, you can follow official Javadoc for Jackson-databind features here.
Interacting with ObjectMapper Directly
Usually, with Spring Boot we don’t need to create the ObjectMaper instance manually as the Spring Boot framework inherently do it for you. As a good practice, we should avoid creating ObjectMapper instances manually as much as possible. However in certain cases if we need to manually create an ObjectMapper instance to serialize and deserialize our way then we can do as below.
This example shows how to use JACKSON API to convert a Java object into a JSON String. We can use the ObjectMapper class provided by the Jackson API for our conversion.
- Serialization : writeValueAsString() is used to convert java object to JSON
ObjectMapper mapper = new ObjectMapper();
try {
  String json = mapper.writeValueAsString(cat);
  System.out.println("ResultingJSONstring = " + json);
  //System.out.println(json);
} catch (JsonProcessingException e) {
   e.printStackTrace();
}
- Deserialization : readValue() is used to convert JSON into java object
Employee emp = new Employee();
emp.setID(200);
emp.setfirstName("David");
emp.setjobTitle("Associate");
emp.gender("Male");

ObjectMapper mapper = new ObjectMapper();
try {
    String json = mapper.writeValueAsString(Employee);
    System.out.println("ResultingJSONstring = " + json);
    //System.out.println(json);
} Catch (JsonProcessingException e) {
    e.printStackTrace();
    }
Conclusion
In this tutorial, we learned about ObjectMapper and its capabilities. Also, we looked at how to create our own custom serializer and deserializer to ease the transformation. I hope this tutorial was helpful to you.