In this tutorial, you will learn how to create and display an Alert Dialog in Flutter.
If you are interested in Flutter video tutorials, check this playlist: Flutter Video Tutorials. Also, there is a large collection of code examples if you check Flutter tutorials page.
Creating Alert Dialog
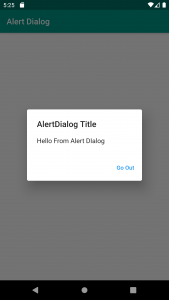
Alert Dialog is a pop-up widget in Flutter that can be used to display a message to the user. Below is a code example in Flutter that creates a very simple alert dialog with a title, message, and one button. When the button is tapped, the dialog window will be dismissed.
Future<void> _showMyDialog() async {
  return showDialog<void>(
    context: context,
    barrierDismissible: false, //this means the user must tap a button to exit the Alert Dialog
    builder: (BuildContext context) {
      return AlertDialog(
        title: Text('AlertDialog Title'),
        content: SingleChildScrollView(
          child: ListBody(
            children: <Widget>[
              Text('Hello From Alert DIalog'),
            ],
          ),
        ),
        actions: <Widget>[
          FlatButton(
            child: Text('Approve'),
            onPressed: () {
              Navigator.of(context).pop();
            },
          ),
        ],
      );
    },
  );
}
Displaying Alert Dialog
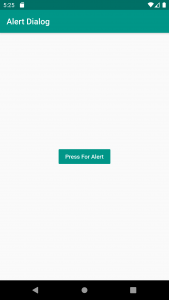
The above code example is an asynchronous function that creates and makes the Alert Dialog visible. But the dialog window will not appear unless this function is called. With the following code example, I am creating a simple button that will call our function _showMyDialog() and will make an alert window appear.
child: FlatButton(
  color: Colors.teal,
  textColor: Colors.white,
  onPressed: () {
    _showMyDialog();
  },child: Text('Press For Alert'),
),
Dismissing Alert Dialog
It is important to let the user dismiss the alert window when it is displayed. Normally, an alert dialog will have at least one button. When this button is tapped, the alert message is dismissed. To dismiss the alert, we call the pop() function on the Navigator object.
Navigator.of(context).pop();
We call the pop() function on the Navigator object when an alert button is tapped to dismiss it.
FlatButton(
   child: Text('Go Out'),
   onPressed: () {
     Navigator.of(context).pop();
   },
),
Complete Code Example
To show you how to use the above code snippets in a very simple example, I have created a little app. Below is a complete code example for you to try.
import 'package:flutter/material.dart';

void main() {
  runApp(MyApp());
}

class MyApp extends StatelessWidget {
  // This widget is the root of your application.
  @override
  Widget build(BuildContext context) {
    return MaterialApp(
      debugShowCheckedModeBanner: false,
      title: 'Alert Dialog',
      theme: ThemeData(
        primarySwatch: Colors.blue,
      ),
      home: MyHomePage(title: 'Alert Dialog'),
    );
  }
}

class MyHomePage extends StatefulWidget {
  MyHomePage({Key key, this.title}) : super(key: key);
  final String title;

  @override
  _MyHomePageState createState() => _MyHomePageState();
}

class _MyHomePageState extends State<MyHomePage> {
  TextEditingController _textFieldController = TextEditingController();

  Future<void> _showMyDialog() async {
    return showDialog<void>(
      context: context,
      barrierDismissible: false,
      //this means the user must tap a button to exit the Alert Dialog
      builder: (BuildContext context) {
        return AlertDialog(
          title: Text('AlertDialog Title'),
          content: SingleChildScrollView(
            child: ListBody(
              children: <Widget>[
                Text('Hello From Alert DIalog'),
              ],
            ),
          ),
          actions: <Widget>[
            FlatButton(
              child: Text('Go Out'),
              onPressed: () {
                Navigator.of(context).pop();
              },
            ),
          ],
        );
      },
    );
  }

  @override
  Widget build(BuildContext context) {
    return Scaffold(
      appBar: AppBar(
        backgroundColor: Colors.teal,
        title: Text('Alert Dialog'),
      ),
      body: Center(
        child: FlatButton(
          color: Colors.teal,
          textColor: Colors.white,
          onPressed: () {
            _showMyDialog();
          },child: Text('Press For Alert'),
        ),
      ),
    );
  }
}
If you run the above code example you should see a button in the center of the screen. When the button is tapped, it should display an alert dialog as illustrated in the image below.
I hope this Flutter tutorial is helpful to you. If you are interested in learning Flutter, please check other Flutter tutorials on this site. Some of them have video tutorials included.
Happy learning!