In this tutorial, you will learn how to create UIButton programmatically. You will also learn how to do the basic customization of UIButton like setting button tint color, background color and making your button call a function when tapped.
Create UIButton
A new UIButton can be created of different types:
- ButtonType.custom,
- ButtonType.system,
- ButtonType.detailDisclosure,
- ButtonType.infoLight,
- ButtonType.infoDark,
- ButtonType.contactAdd,
- ButtonType.close.
To create a regular, system type button in Swift you will need to create a new instance of UIButton class.
// Create UIButton
let myButton = UIButton(type: .system)
To create a button of a different type like for example ButtonType.close, you will do:
// Create UIButton
let myButton = UIButton(type: .close)
Button Width, Height and Position
To create a new UIButton, set its width, height, and position the button within a view programmatically, you can do with CGRect class. For example:
// Create UIButton
let myButton = UIButton(type: .system)

// Position Button
myButton.frame = CGRect(x: 20, y: 20, width: 100, height: 50)
Set Button Title Text
Setting text on a button is very simple. It can be done with a function call setTitle(_ title: String?, for state: UIControl.State) .
// Set text on button
myButton.setTitle("Tap me", for: .normal)
A title on the button can be set for different button states. For example, we can change button text when the button is highlighted (press+hold).
myButton.setTitle("Pressed", for: .highlighted)
The different button states used with the setTitle function are:
public static var normal: UIControl.State { get }

public static var highlighted: UIControl.State { get } // used when UIControl isHighlighted is set

public static var disabled: UIControl.State { get }

public static var selected: UIControl.State { get } // flag usable by app (see below)

@available(iOS 9.0, *)
public static var focused: UIControl.State { get } // Applicable only when the screen supports focus

public static var application: UIControl.State { get } // additional flags available for application use

public static var reserved: UIControl.State { get } // flags reserved for internal framework use
Set Button Action
When the button is tapped we can make it call a function. To add an action call to our button we will need to use the addTarget() function.
myButton.addTarget(self, action: #selector(buttonAction(_:)), for: .touchUpInside)
@objc func buttonAction(_ sender:UIButton!) {
   print("Button tapped")
}
where:
- the buttonAction() is the name of the function that needs to be called,
- the .touchUpInside is a control event.
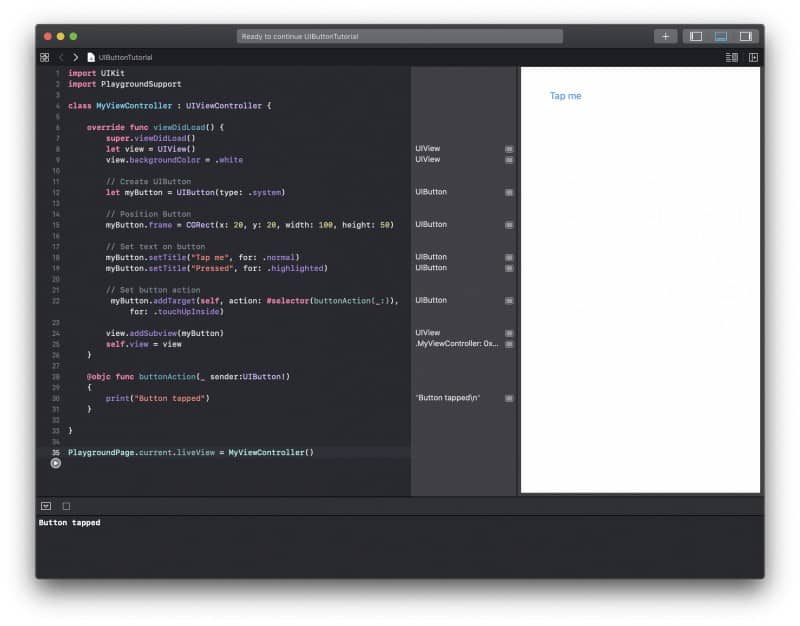
Complete Code Example
Below is a complete code example. You can code copy and run this code in your Xcode Playground to see how it works.
import UIKit
import PlaygroundSupport

class MyViewController : UIViewController {

    override func viewDidLoad() {
        super.viewDidLoad()
        let view = UIView()
        view.backgroundColor = .white

        // Create UIButton
        let myButton = UIButton(type: .system)

        // Position Button
        myButton.frame = CGRect(x: 20, y: 20, width: 100, height: 50)

        // Set text on button
        myButton.setTitle("Tap me", for: .normal)
        myButton.setTitle("Pressed + Hold", for: .highlighted)

        // Set button action
         myButton.addTarget(self, action: #selector(buttonAction(_:)), for: .touchUpInside)

        view.addSubview(myButton)
        self.view = view
    }

    @objc func buttonAction(_ sender:UIButton!)
    {
        print("Button tapped")
    }

}

PlaygroundPage.current.liveView = MyViewController()
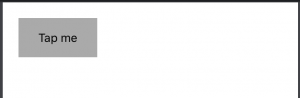
When I run this Swift code snippet in my Xcode Playground, I get the following result.
Change UIButton Background and Tint Color
Changing the background color and the tintColor of the button programmatically is also very easy.
// Set button tint color
myButton.tintColor = UIColor.black

// Set button background color
myButton.backgroundColor = UIColor.lightGray
This will make my button look like the one below:
I hope this short tutorial was of some aid to you. There are lots of things you can do with UIButton programmatically and all will not fit into a single tutorial. Have a look at other Swift tutorials on this blog. There lots of other very useful ones.
Happy learning! 🙋🏻♂️