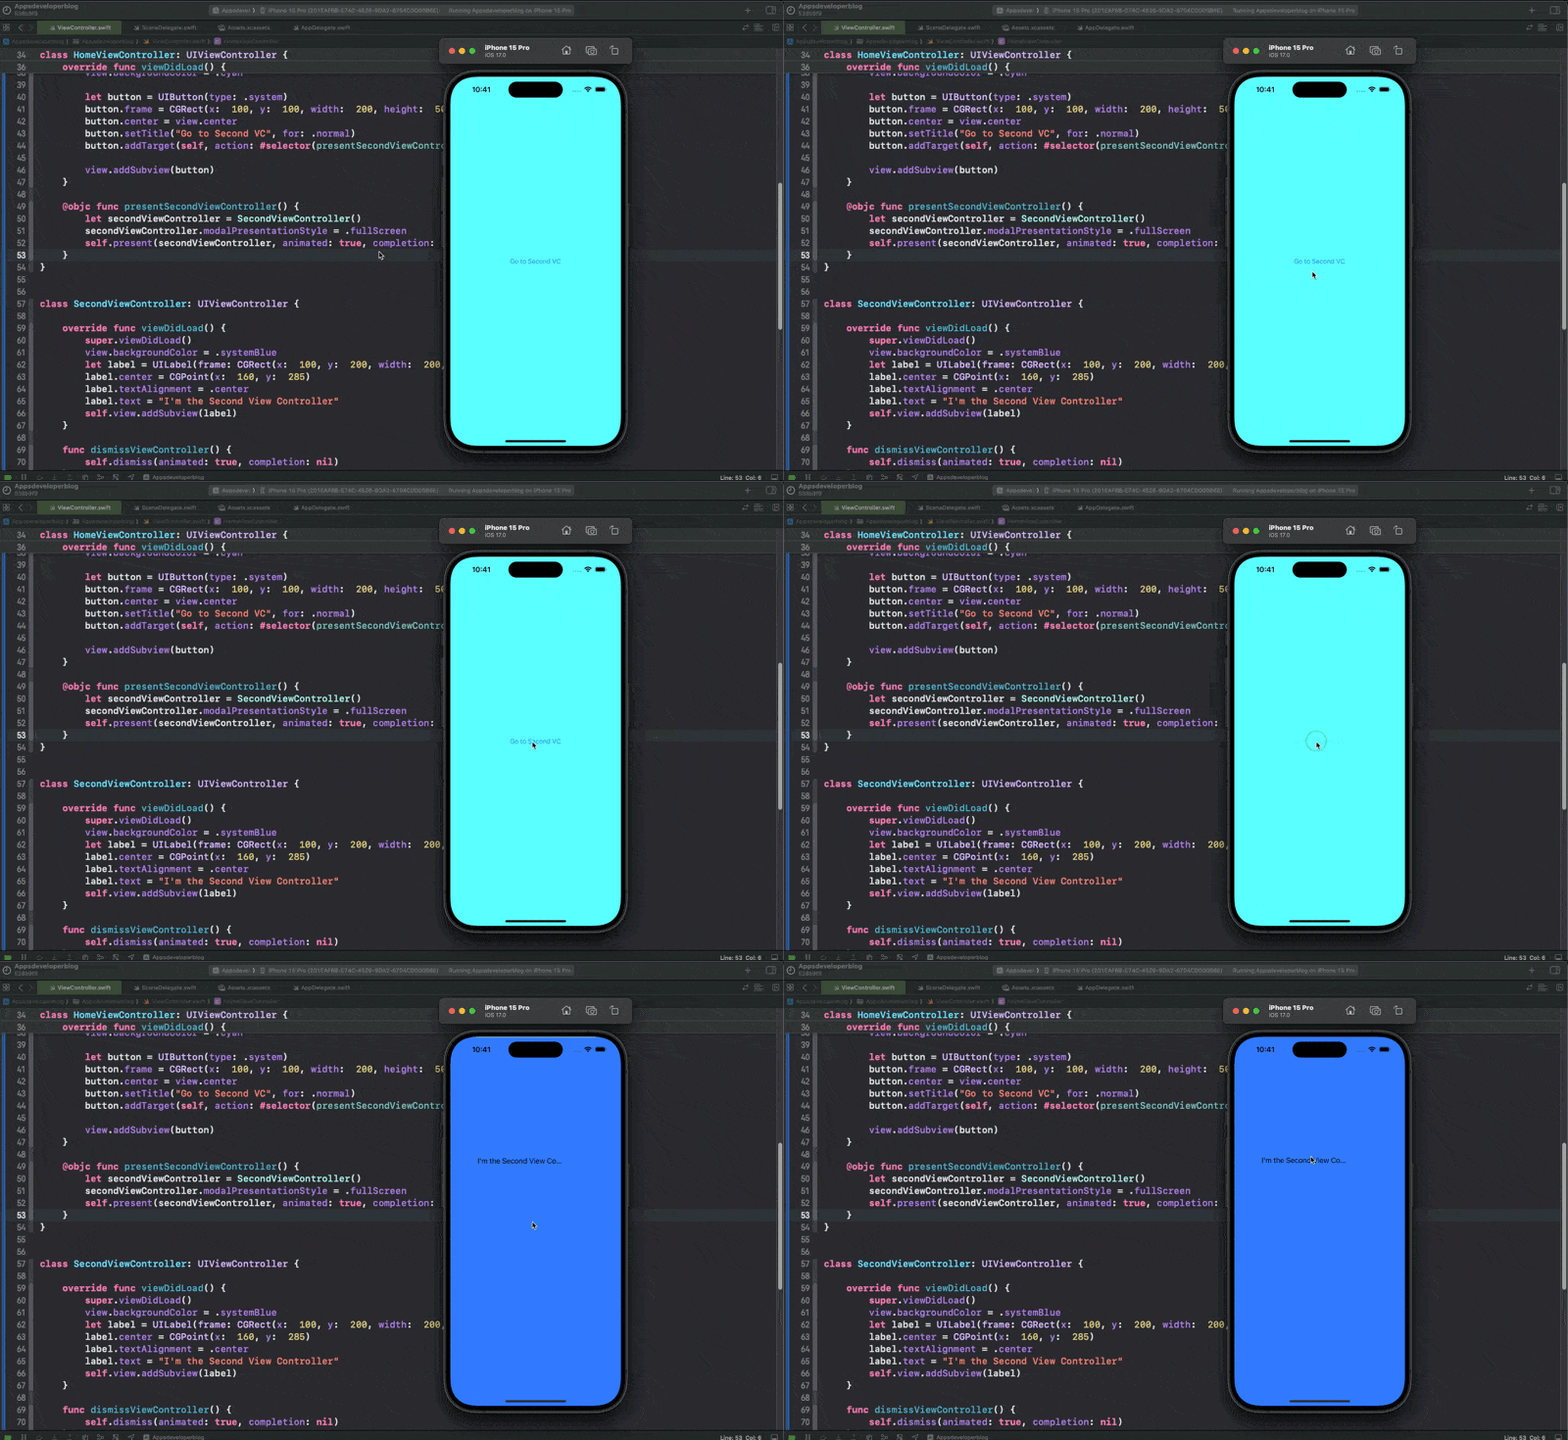
In this tutorial, you will learn how to present ViewController in Swift. By the end of this tutorial, you will have a working Swift code example that you can use in your mobile application.
Presenting a ViewController in Swift involves displaying a new screen (ViewController) over the current one. This can be done programmatically or using segues in a storyboard. The process involves creating an instance of the ViewController you want to present, configuring it as needed, and then using the present(_:animated:completion:) method to display it.
To learn how to present view controller from an AppDelegate swift file, please read the following tutorial: Navigate From AppDelegate.swift to a Different ViewController.
Step 1: Creating the ViewController to Present
First, make sure you have a ViewController that you want to present. If you’re using a storyboard, you can instantiate it using its storyboard identifier. If you’re doing it programmatically, you can simply create a new instance of the ViewController class.
Using Storyboard
If your ViewController is defined in a storyboard, you can instantiate it using its identifier:
let storyboard = UIStoryboard(name: "Main", bundle: nil)
let viewControllerToPresent = storyboard.instantiateViewController(withIdentifier: "YourViewControllerIdentifier") as! YourViewControllerClass
Programmatically
If you’re creating the ViewController programmatically, you can instantiate it directly:
let viewControllerToPresent = YourViewControllerClass()
Step 2: Configuring the ViewController
Before presenting the ViewController, you might want to configure it. This could involve setting properties, passing data, or setting up the user interface.
viewControllerToPresent.someProperty = someValue
Step 3: Presenting the ViewController
To present the ViewController, use the present(_:animated:completion:) method on the current ViewController. The animated parameter determines whether the presentation should be animated. The completion parameter is a closure that gets called after the presentation is complete.
self.present(viewControllerToPresent, animated: true, completion: nil)
Step 4: Dismissing the ViewController
To dismiss the presented ViewController, you can call the dismiss(animated:completion:) method on the presented ViewController itself.
self.dismiss(animated: true, completion: nil)
Complete Code Example
Below is the complete code example that presents ViewController in Swift. This example demonstrates how to programmatically create and present a ViewController. It involves creating two ViewControllers (FirstViewController and SecondViewController), programmatically adding a button to the first ViewController, and using that button to present the second ViewController.
import UIKit

// MARK: First View
class FirstViewController: UIViewController {

    override func viewDidLoad() {
        super.viewDidLoad()
        view.backgroundColor = .cyan

        let button = UIButton(type: .system)
        button.frame = CGRect(x:  100, y:  100, width:  200, height:  50)
        button.center = view.center
        button.setTitle("Go to Second VC", for: .normal)
        button.addTarget(self, action: #selector(presentSecondViewController), for: .touchUpInside)

        view.addSubview(button)
    }

    @objc func presentSecondViewController() {
        let secondViewController = SecondViewController()
        secondViewController.modalPresentationStyle = .fullScreen
        self.present(secondViewController, animated: true, completion: nil)
    }
}

// MARK: Second View
class SecondViewController: UIViewController {

    override func viewDidLoad() {
        super.viewDidLoad()
        view.backgroundColor = .systemBlue
        let label = UILabel(frame: CGRect(x:  100, y:  200, width:  200, height:  21))
        label.center = CGPoint(x:  160, y:  285)
        label.textAlignment = .center
        label.text = "I'm the Second View Controller"
        self.view.addSubview(label)
    }

    func dismissViewController() {
        self.dismiss(animated: true, completion: nil)
    }
}

Conclusion
I hope this tutorial was helpful to you.
To learn more about Swift and to find other code examples, check the following page: Swift Code Examples.
Keep coding!